
Introduction
This walkthrough demonstrates how to add a “Claim Entry” link to a view in GravityView which allows users to take ownership of entries after an approval process so they can edit their entries.
Requirements
The following plugins are required:
- Gravity Forms
- GravityView
- Gravity Flow
- Gravity Flow Form Connector Extension
- Gravity Forms User Registration Add-On (required only if you want to add a User Registration step)
You’ll also need to have a view already configured in GravityView for your form which displays the directory.
Objective
We want visitors to be able to claim ownership of entries so they can log in and edit field values. Before the ownership is granted, however, the request must pass through an approval process. If approved, a new user account will be created and then the entry will be assigned to the new user.
The view might look something like this:

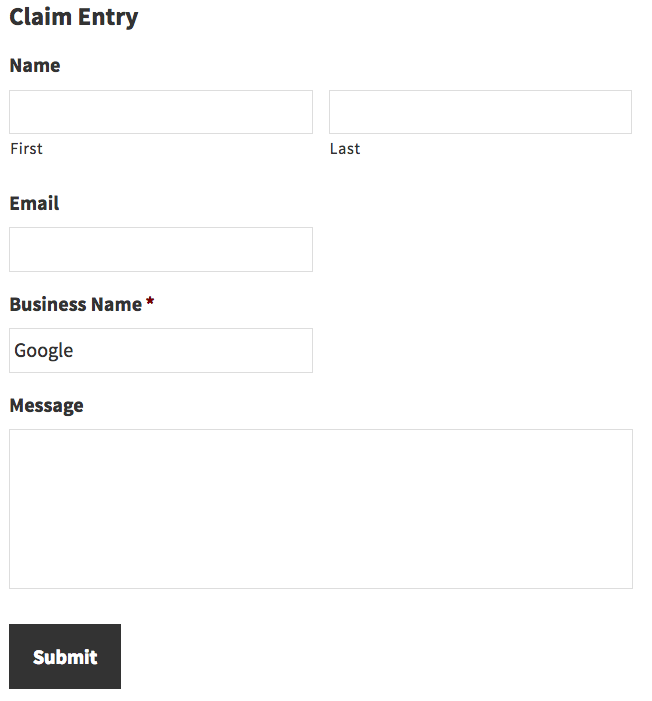
Clicking on the “I’m the owner” link will take the visitor to the “Claim Entry” form which might look something like this:
Once approved, the user will receive account details and finally a confirmation email with instructions on how to edit the entry.
Instructions
Create the “Claim Entry” form
First we need to create a new form so users can claim ownership of entries. Create a new form with the following fields:
- Name Field.
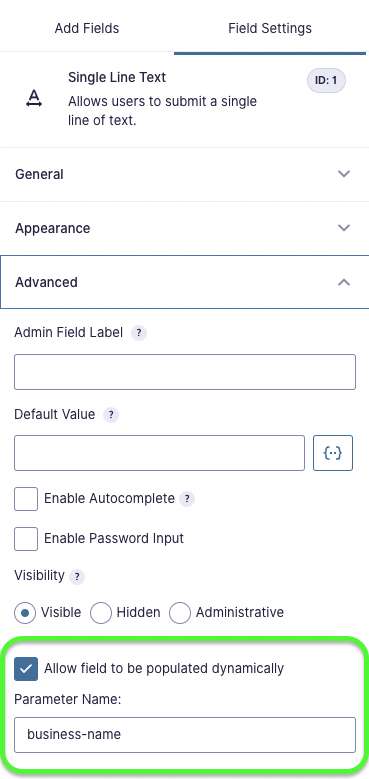
- Single Line Text Field for the Business Name. Enable the Allow field to be populated dynamically setting and set the parameter name to business-name.
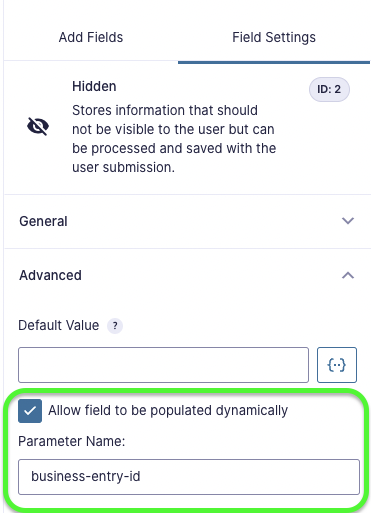
- Hidden Field for the Business Entry ID. Enable the Allow field to be populated dynamically setting and set the parameter name to business-entry-id.
- Paragraph Field for an optional message.
The Workflow Steps
Next we need to add the following four workflow steps:
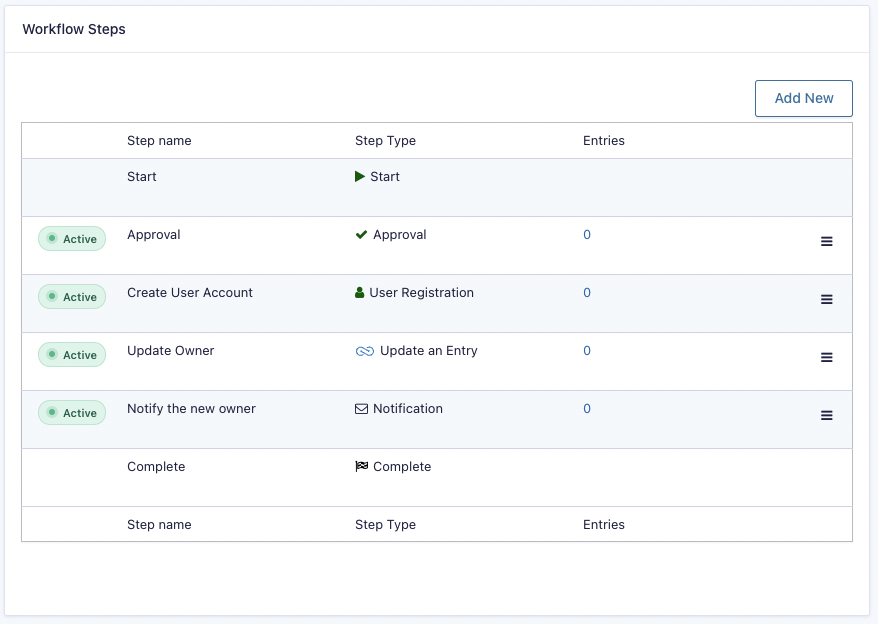
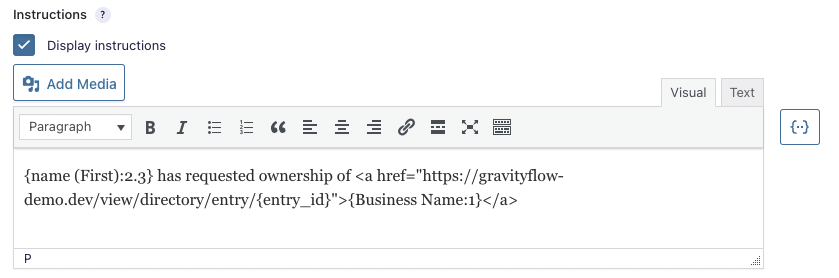
The Approval step is assigned to the admin responsible for moderating the list. See the link below for further details on how to create an approval step.
Suggestion: in the instructions Add a link to the single entry view to allow the user to view and verify the entry with the business details.
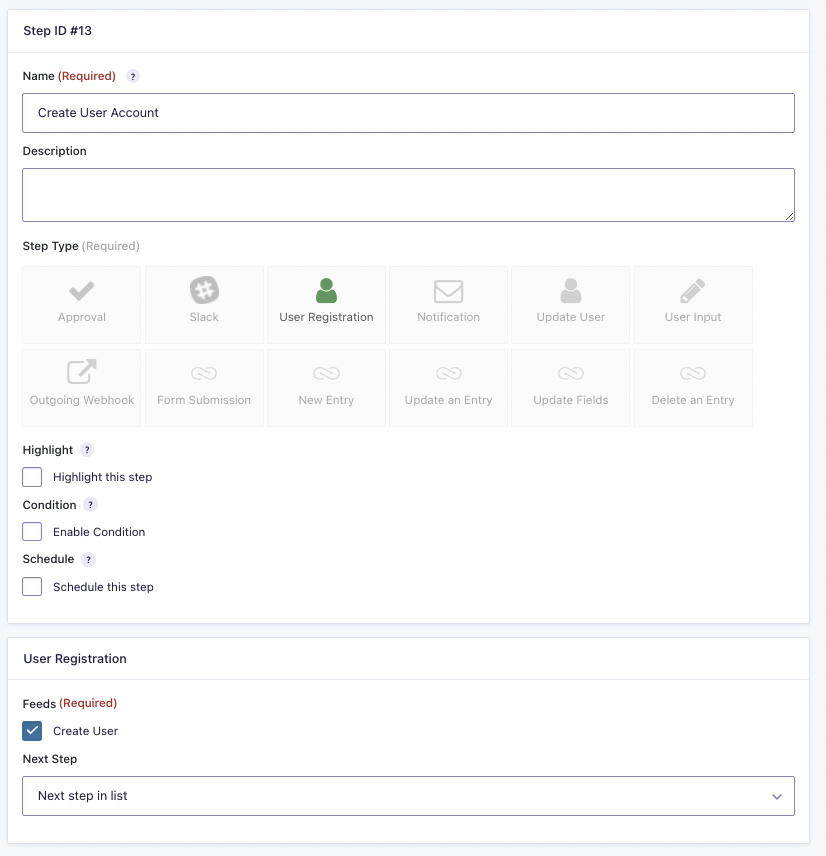
Create User Account (Optional)
If your users already have user accounts then you don’t need to add this step. Configure a ” Create User” User Registration feed and select it when adding a new User Registration step.

The User Registration Step simply triggers the Create User feed.
Assign the entry to the new owner
Add an Update an Entry step to update the target entry for the Business Directory form.
Select the form used for the directory view.
Select the Business Entry ID hidden field.
Add one field mapping: “Created By” <=> “Created By”
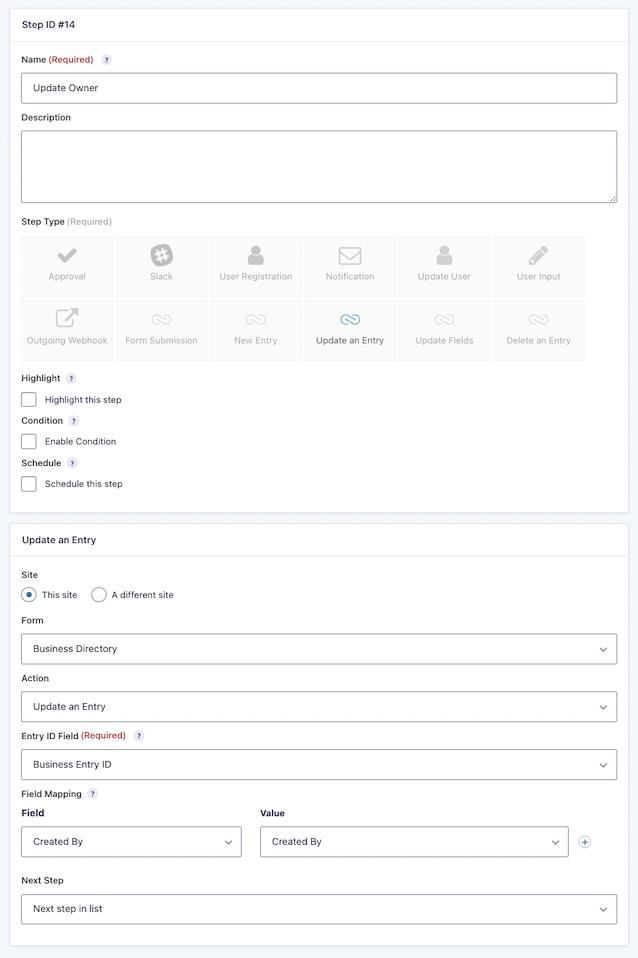
Important: The Entry ID field must contain the Entry ID of the entry that must be updated. This is currently the only way the step can lookup the target entry.
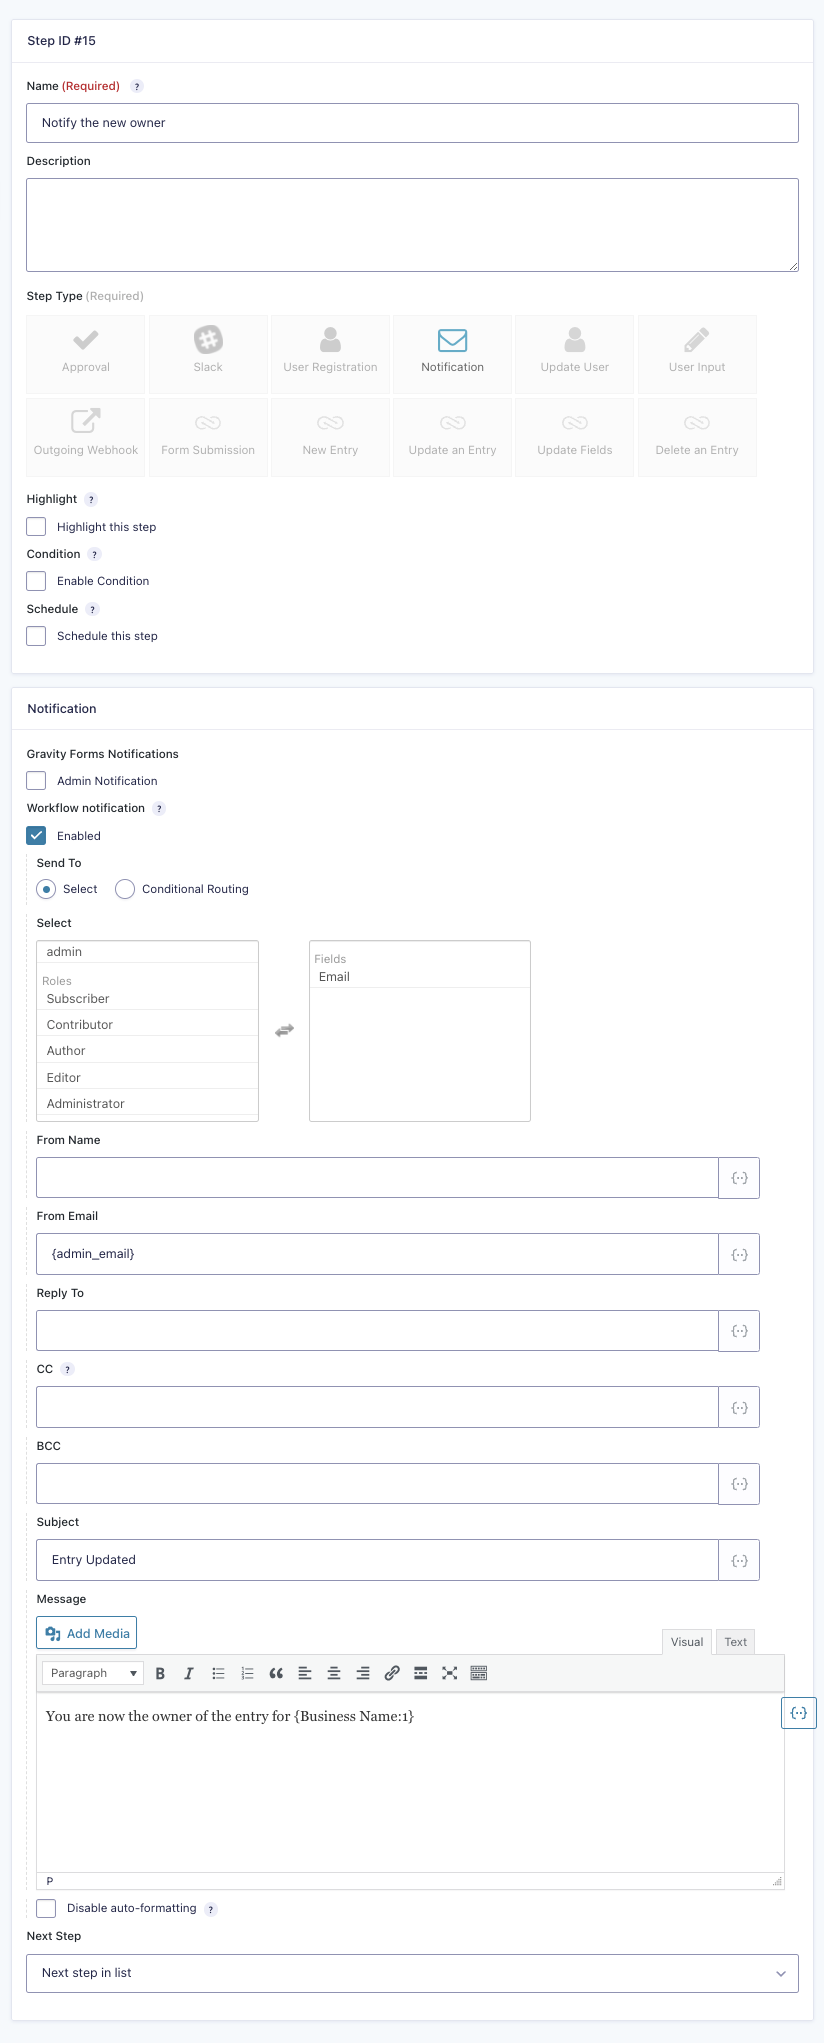
Notify the new owner
Add a Notification step and enable the workflow notification.
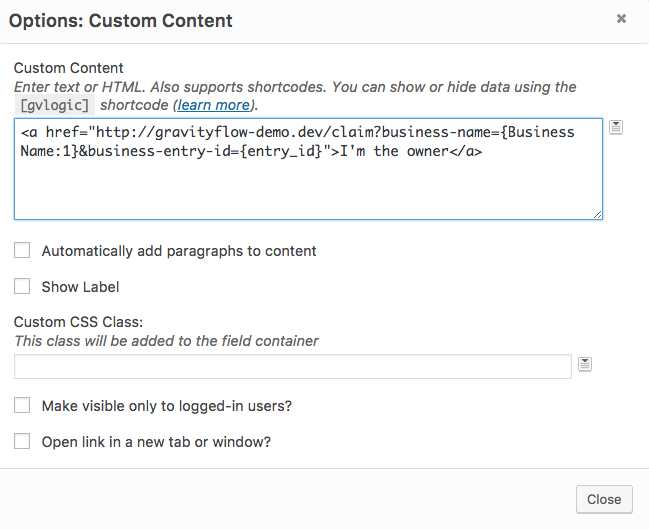
Adding the “Claim Entry” Link
Finally, in the the view configuration we need to add the “Claim Entry” link.
– Add a custom content field and link to the page with your “Claim Entry” form. Add the business-name and business-entry-id URL params using merge tags. e.g. http://your-site.com/claim-entry-form?business-name={Business Name:1}&business-entry-id={entry_id}
Conclusion
By adding four workflow steps and a “claim entry” link in GravityView we’ve created a custom workflow for re-assigning entries to new users.