
Introduction
All steps can be scheduled by activating the Schedule setting. Scheduling can be useful when two steps are being triggered too close together, or when you need to perform a step on specific date.
This feature is particularly useful for so-called “content-dripping,” where a series of notification steps are triggered over a number of days or weeks. For example, a customer has signed up for a course that should be delivered by email every day over the course of a week. You’d create seven steps, each with a delay of one day.
Scheduling a Gravity Flow Step
Steps can be scheduled to begin after a specified delay in minutes, hours, days, or weeks.
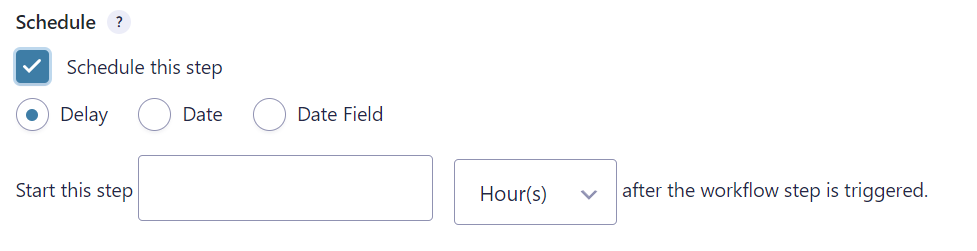
Note: Delay settings are not exact. Up to 15 minutes could pass before the step is actually triggered.
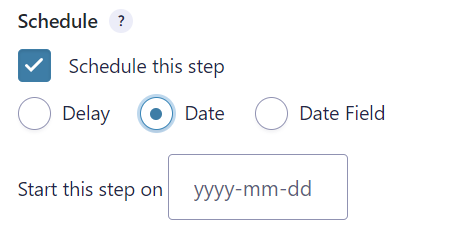
Steps can also be scheduled to begin on a specific date. For example, for an event.
If you choose to use this feature for email list automation, like an ‘auto-responder,’ remember to include a one-click cancel link in the emails. Also, remember that your email server may not be designed to send out bulk emails. Gravity Flow passes the email to WordPress for sending and is not responsible for email deliverability.
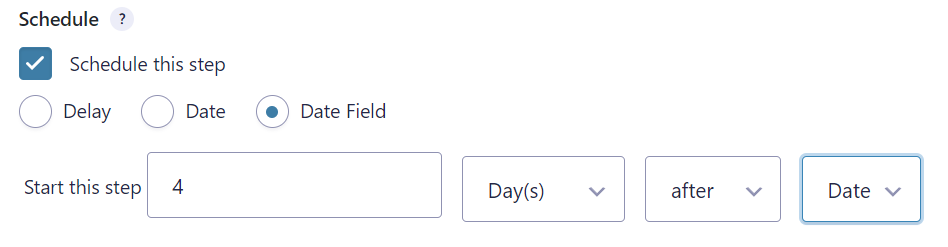
Finally, steps can be scheduled to start on, before, or after the date in a date field.
How Gravity Flow Handles Scheduled Events
Gravity Flow uses WordPress’s WP-Cron system to schedule time-based tasks, including the gravityflow_cron event, which runs every 15 minutes to process queued workflow steps.
Note: Since WP-Cron relies on site visits to trigger scheduled events, tasks may be delayed during periods of low traffic. For example, if a workflow step is due at 4:00 AM but no one visits the site until 8:00 AM, it won’t run until then. Additionally, running scheduled tasks too frequently can affect site performance. For more information, see the What Is WP-Cron guide.