
Introduction
This document explains how to connect a Form Connector workflow step from your source site (where your workflow is being created) to a remote site. This can be done using either REST API version 1 or version 2.
REST API v2 is the newer version of the Gravity Forms REST API that uses OAuth, and is generally the better choice when both sites support it. It requires Form Connector Extension version 2.1 or later. REST API v1 is the original version that uses an API key pair, and may be appropriate if either site runs an earlier Form Connector version, or if an existing connection already depends on it. With either version, the REST API must be enabled on the remote site, and HTTPS is recommended for the connection.
Note: Some settings refer to the remote site as the “target” site. These terms are interchangeable.
Using REST API Version 1
When connecting via version 1, each Form Connector workflow step will require credentials and a remote site URL. Remote connection is supported by all of these workflow steps:
- Form Connector – Delete an Entry
- Form Connector – Update Fields
- Form Connector – Update An Entry
- Form Connector – Create An Entry
The Form Submission step is not supported for remote use.
Get the API keys from the Remote Site
First we need to fetch the Public and Private API Keys to be used later in the Form Connector step settings.
- On the remote site (the site you want to connect to), go to Forms → Settings → REST API → Authentication ( API version 1 ).
- Copy the Public and Private API keys for later use.
- Under “Impersonate account” select the user you want to the remote connection to use (usually this will be your user).
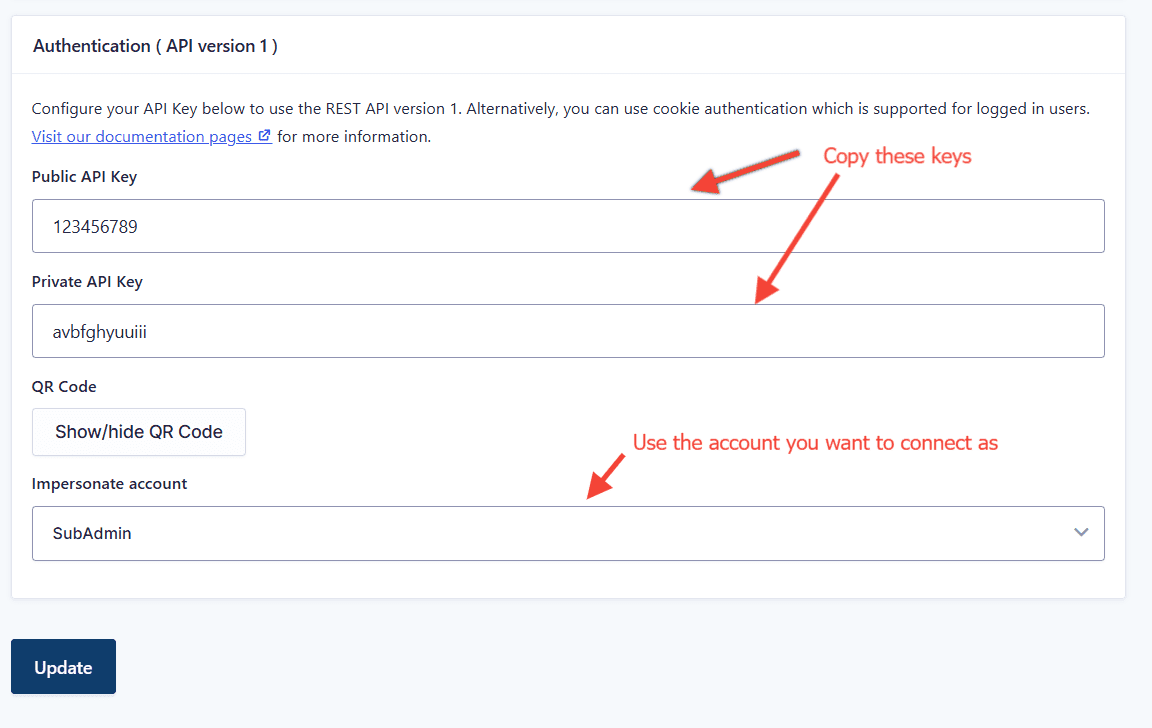
Connecting to a Remote site using REST API version 1
- Add a Form Connector step to your workflow on the source site (the Form Submission step is not supported for remote use).
- Update the step settings with the values shown in the table below.
- Click the Update Button
| Setting | Value Required |
|---|---|
| Target site | A different site |
| REST API | Version 1 |
| Site URL | The URL of the remote site. Example: https://yourRemoteSite.url |
| Public Key | As copied from the remote site. |
| Private Key | As copied from the remote site. |
The Form dropdown will now populate the forms from the remote site, allowing you to select the form you want to use and begin completing the other workflow step settings required.
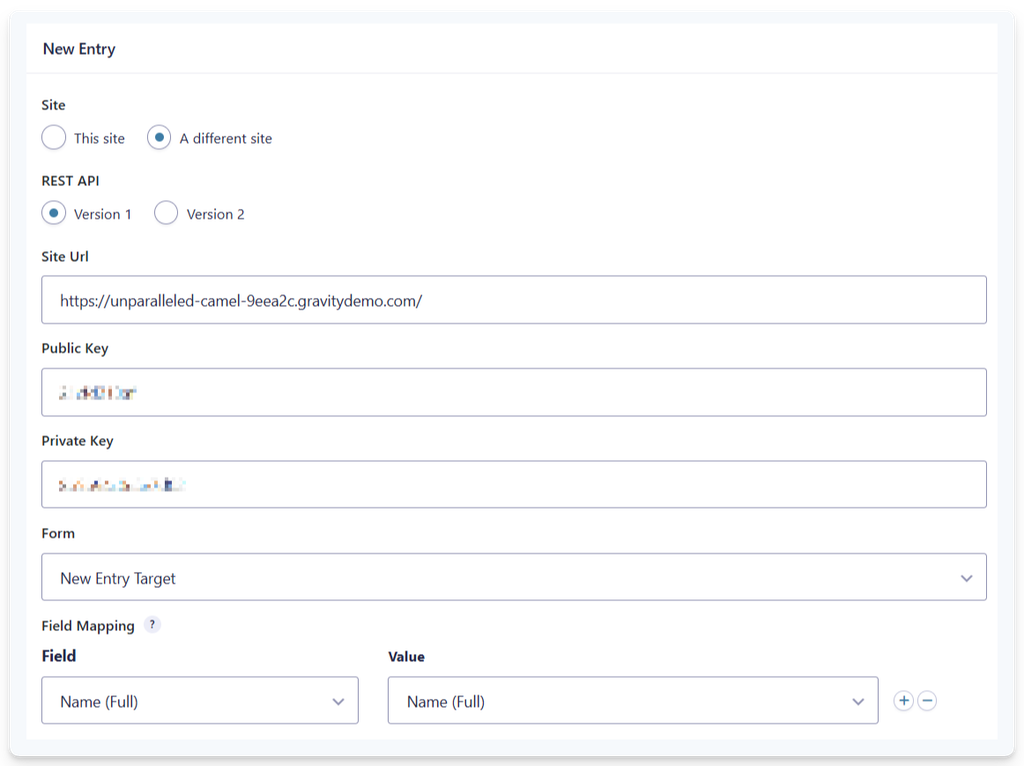
Using REST API Version 2
To connect to REST API Version 2, a Connected App is required. This provides the link between your source and remote site. This only needs to be setup once on each site, and can then be chosen for any supported workflow step.
Creating a Connected App
This section describes how to create a Connected App if you do not already have one setup for this purpose.
- On the Source site, go to Workflow → Settings → Connected Apps → Add New
- Enter the following values for the Add An App settings:
- App Name: any suitable name that best describes the purpose of this app
- App Type: select “WordPress OAuth1”
- URL: the URL of your intended remote site.
- Click Next.
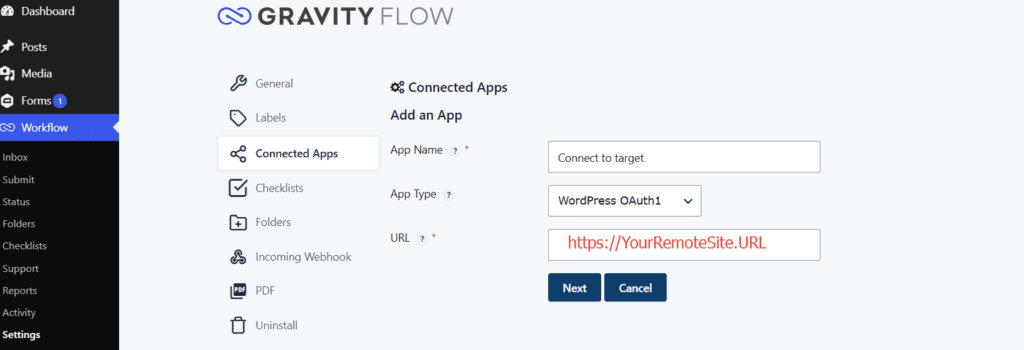
Capturing the Callback URL
This step captures the URL of the connected app on your source site. Record it somewhere as it will be used later in the remote site settings.
- On the source site, navigate to Workflow → Connected Apps.
- On the row that has the connected app you will use to connect to your remote site, click Edit.
- On the Edit App screen, capture the full URL of the connected app from the browser URL box. The URL should look something like https://YourSourceSite.URL/wp-admin/admin.php?page=gravityflow_settings&view=connected_apps&app=6abd147147037.
Connecting the Remote Site
- Login to your remote site.
- Install and activate the WordPress OAuth1 server plugin
- Once active, go to Users → Applications → Add New (see screenshot below) and complete the settings as follows:
- Consumer Name: Type any suitable name that best describes the purpose of the application. Note that this name is shown to users.
- Description: Describe the purpose of this application.
- Callback: Paste the URL that you copied from the source site in the previous section.
- Click Save Consumer.
- This will generate a Client Key and a Client Secret in the OAuth Credentials section. Copy both, as we will need these pasted back to the source site.
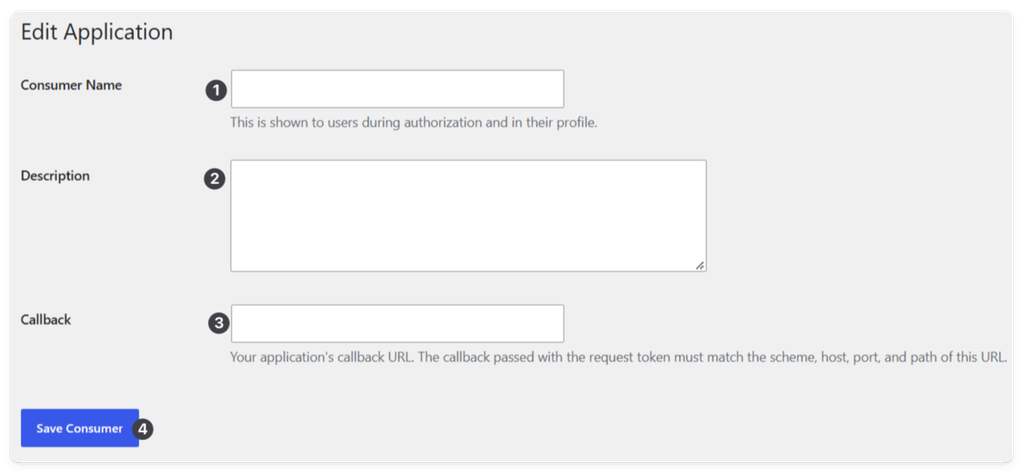
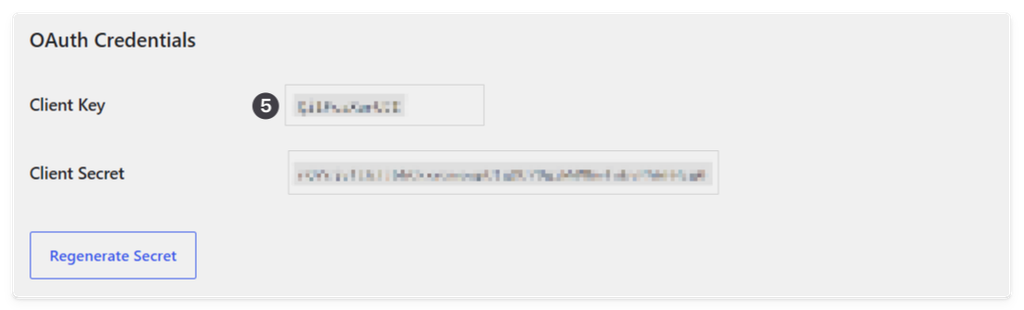
Adding OAuth credentials to your Source Site
Having created a connected app and used it as the remote site callback URL, now you must update your source site connected app with the credentials required for it to connect to the remote site via OAuth.
- Return to your source site
- Go to the Workflow → Connected Apps page again. On the row that has the connected app you are using, click Edit.
- in the settings of the Edit App screen, paste in both the Client Key and the Client Secret.
- Click Authorize App.
- On the pop-up that appears, confirm the information in the dialog and click Authorize.
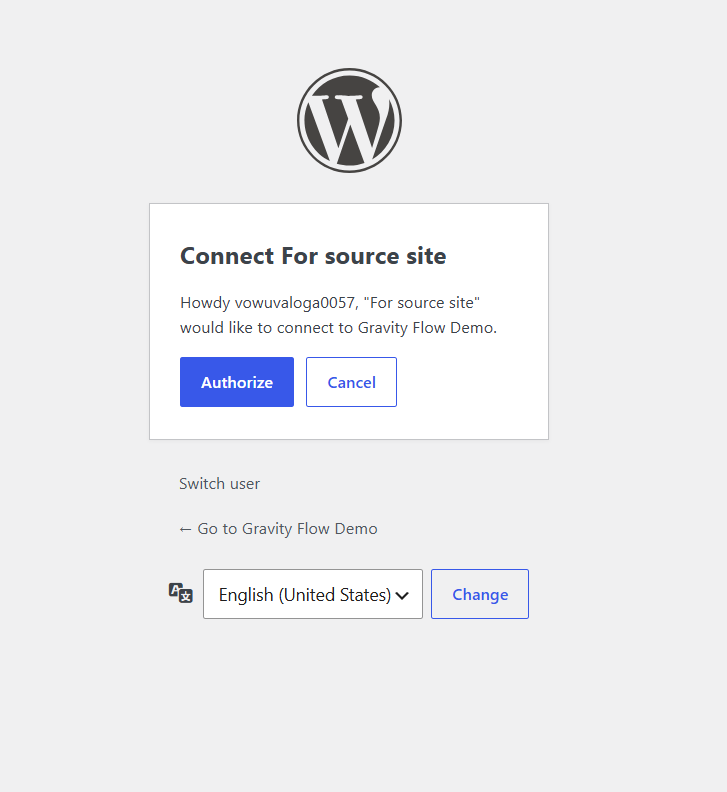
Your connected app settings screen should now show an Authorized Status of Verified.
Setting up a Form Connector Workflow Step
The screenshot below shows an example workflow step that will create a new entry for a form on a remote site, using the REST API v2 connected app. All Form Connector worklow steps will have a similar option to choose a Connected App to connect through to you remote site. Note though that the Form Submission step is not supported for remote operation.
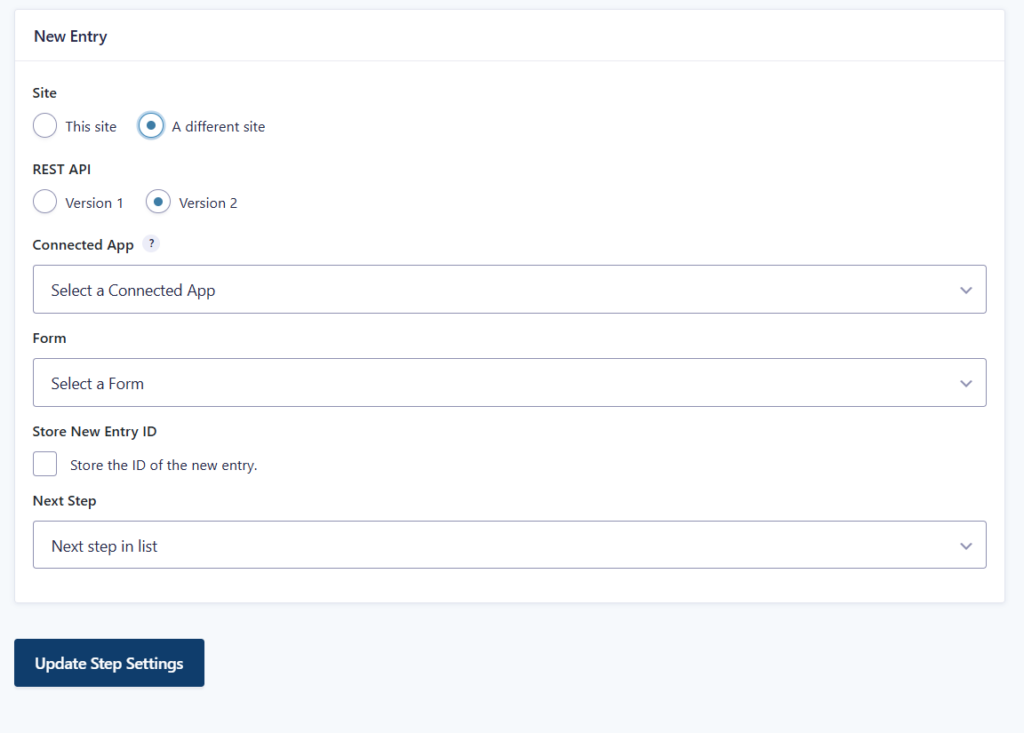
Once you select the Connected App in the drop down, the form menu will populate with a list of forms from that remote site.