
Objective: To illustrate a use-case that could be used to demonstrate the use of a form connector and incoming and outgoing webhooks. We will create an overall workflow that accomplishes the following.
It will contain three forms; 6399-A, 6399-B and 6399-C. Once an entry is created in form 6399-A, the same entry is created in form 6399-B and form 6399-C which then triggers the workflows in those forms.
Forms 6399-B and 6399-C then update entries in 6399-A and also send outgoing webhooks to 6399-A.
Once both webhooks are received, form 6399-A sends out notifications and the workflow completes.
Part I – Setting up Form 6399-A
- Create three gravity forms. If you need instructions for creating Gravity Forms please see – https://docs.gravityforms.com/creating-a-form/. For this illustration, we will name them as follows 6399-A, 6399-B, and 6399-C.
- Each form will have the following elements:
- 6399-A – Will contain three “Text Fields” – See screenshot.

- 6399-B – Will contain two “Text Fields” – See screenshot.

- 6399-C – Will contain two “Text Fields” – See screenshot.

- 6399-A – Will contain three “Text Fields” – See screenshot.
- Create the following steps for 6399-A ONLY.
- Create the Workflow Steps (New Entry Steps) for form 6399-A as follows.
Learn how to create an entry step. - Click “Settings”, then click “Workflow”.

- Click “Add New” button.

- Add the title. We used “create-new-entry-in-6399-B”, then click “New Entry”.

- Complete the lower portion of the page as follows:Note: All of these values should be present in the drop-down field.

- Click the “Update Step Settings” button.
- Duplicate this same Workflow Steps as follows:

 Note: All of these values should be present in the drop-down field. Don’t forget to click the “Update Step Settings” button.
- Create the Workflow Steps (New Entry Steps) for form 6399-A as follows.
- Next, we are going to set up the Workflow Steps (Incoming Webhook).
- Start by clicking “Add New” from the “Workflow” screen.

- Add a “Name”. We used “incoming from Form-B” and click “Incoming Webhook” option.

- Scroll down and add the “Application Name”. We used ” incoming from Form B”.Note: Both the “API Key” and “API Secret” fields are populated automatically.

- The other fields default values are fine. Click “Update Step Settings” button.
- These steps should be repeated for Workflow Step 6399-C as illustrated. The only differences are the text used.
- Add a “Name”. We used “incoming from Form C” and click “Incoming Webhook” option.

- Scroll down and add the “Application Name”. We used ” incoming from Form C”.

- Click the “Update Step Settings” button.
- Finally, we will add the “Notification” workflow.
- Note: At this point in the process, your Workflow for form 6399-A should look like the this (If it does not, please review the previous steps and be sure that you did not miss anything).

- Note: At this point in the process, your Workflow for form 6399-A should look like the this (If it does not, please review the previous steps and be sure that you did not miss anything).
- Again, we will click the “Add New” button.

- Add the name “Notification” and click the “Notification” option.

- Scroll down and tick the “Workflow Notification”, “Enable” option. We used “incoming from Form B”.

- Select the users or roles that should receive the notification when the workflow completes and add the message that they should receive.
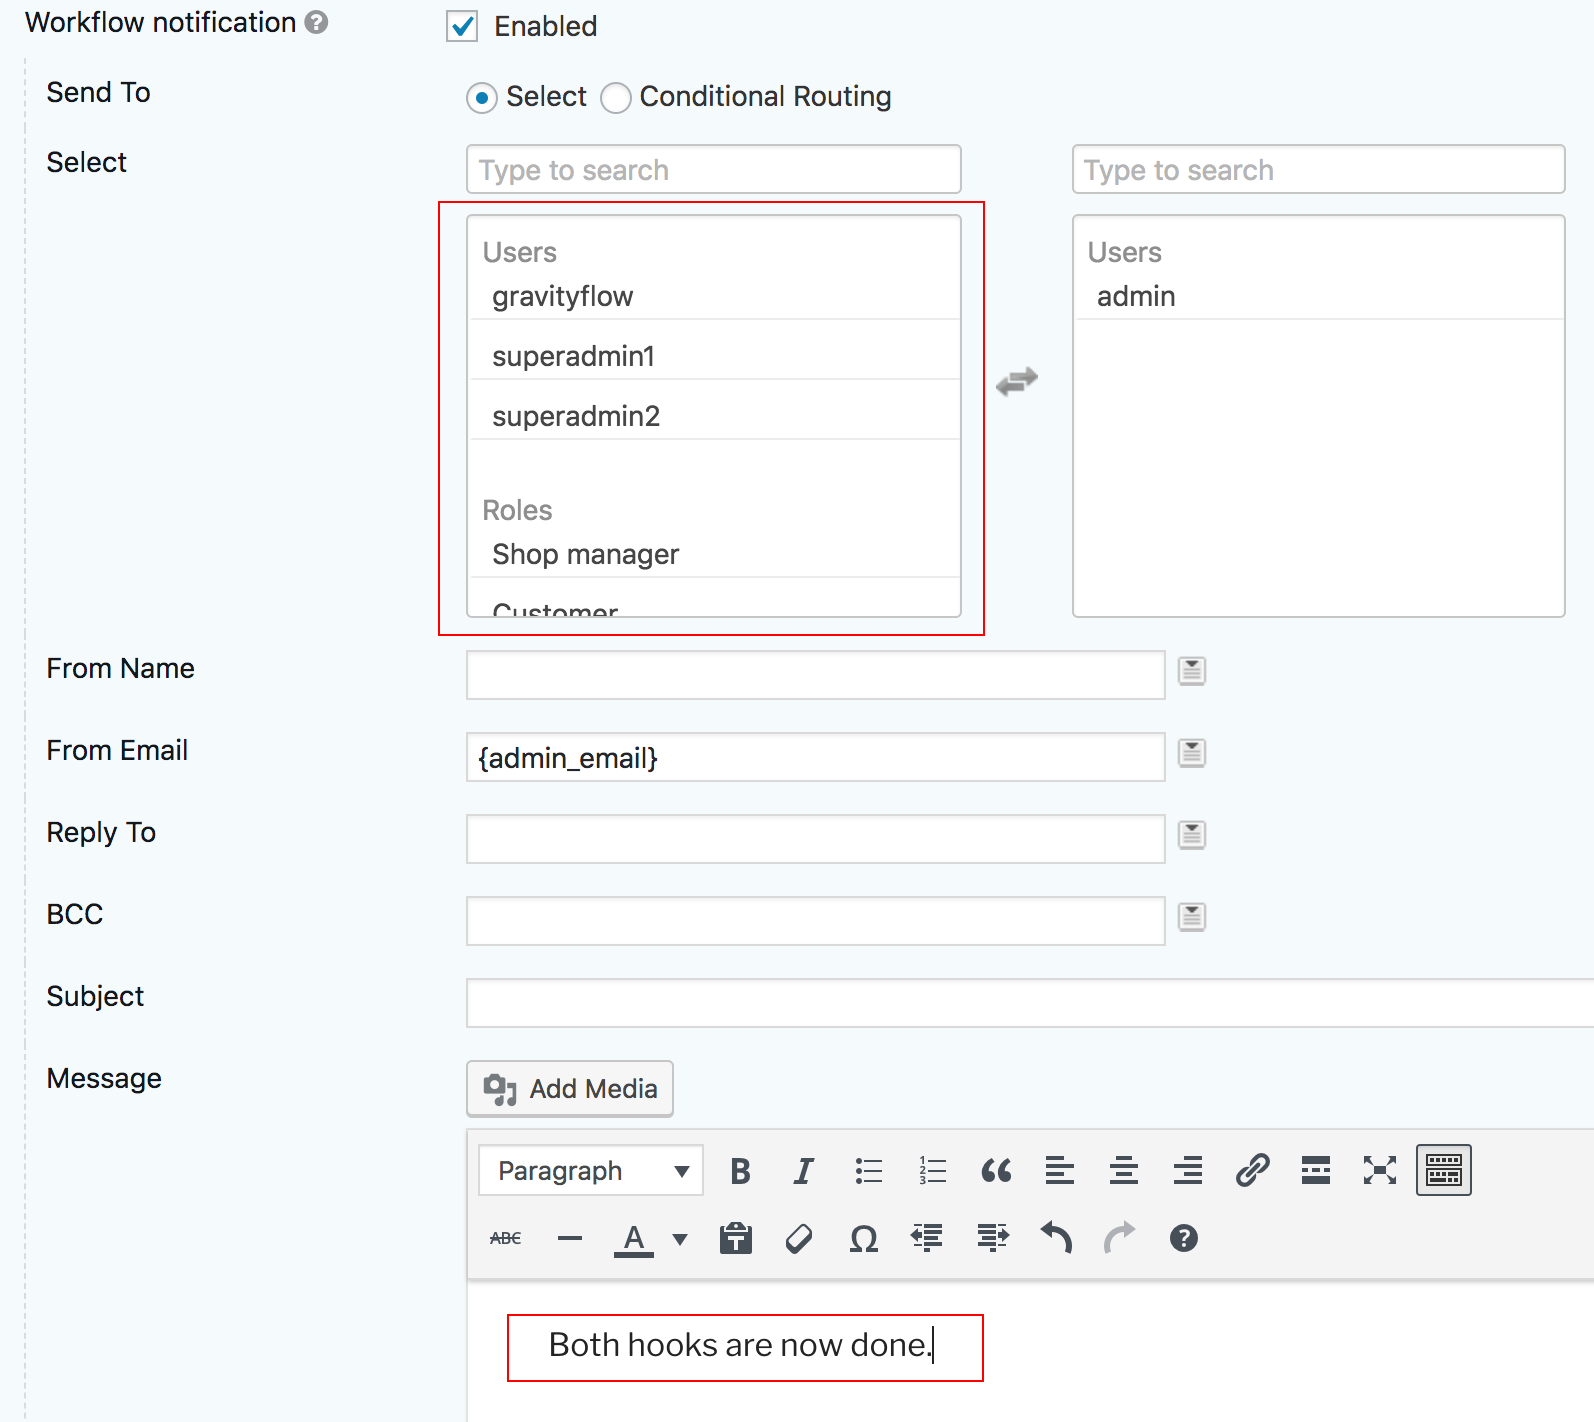
- Click the “Update Step Settings” button.

- Finally, we will add the “Notification” workflow.
- Note: At this point in the process, your Workflow Steps for form 6399-A should look like the this (If it does not, please review the previous steps and be sure that you did not miss anything).

- Note: At this point in the process, your Workflow Steps for form 6399-A should look like the this (If it does not, please review the previous steps and be sure that you did not miss anything).
- Start by clicking “Add New” from the “Workflow” screen.
Part II – Setting up Form 6399-B
- Click the “Add New” button.
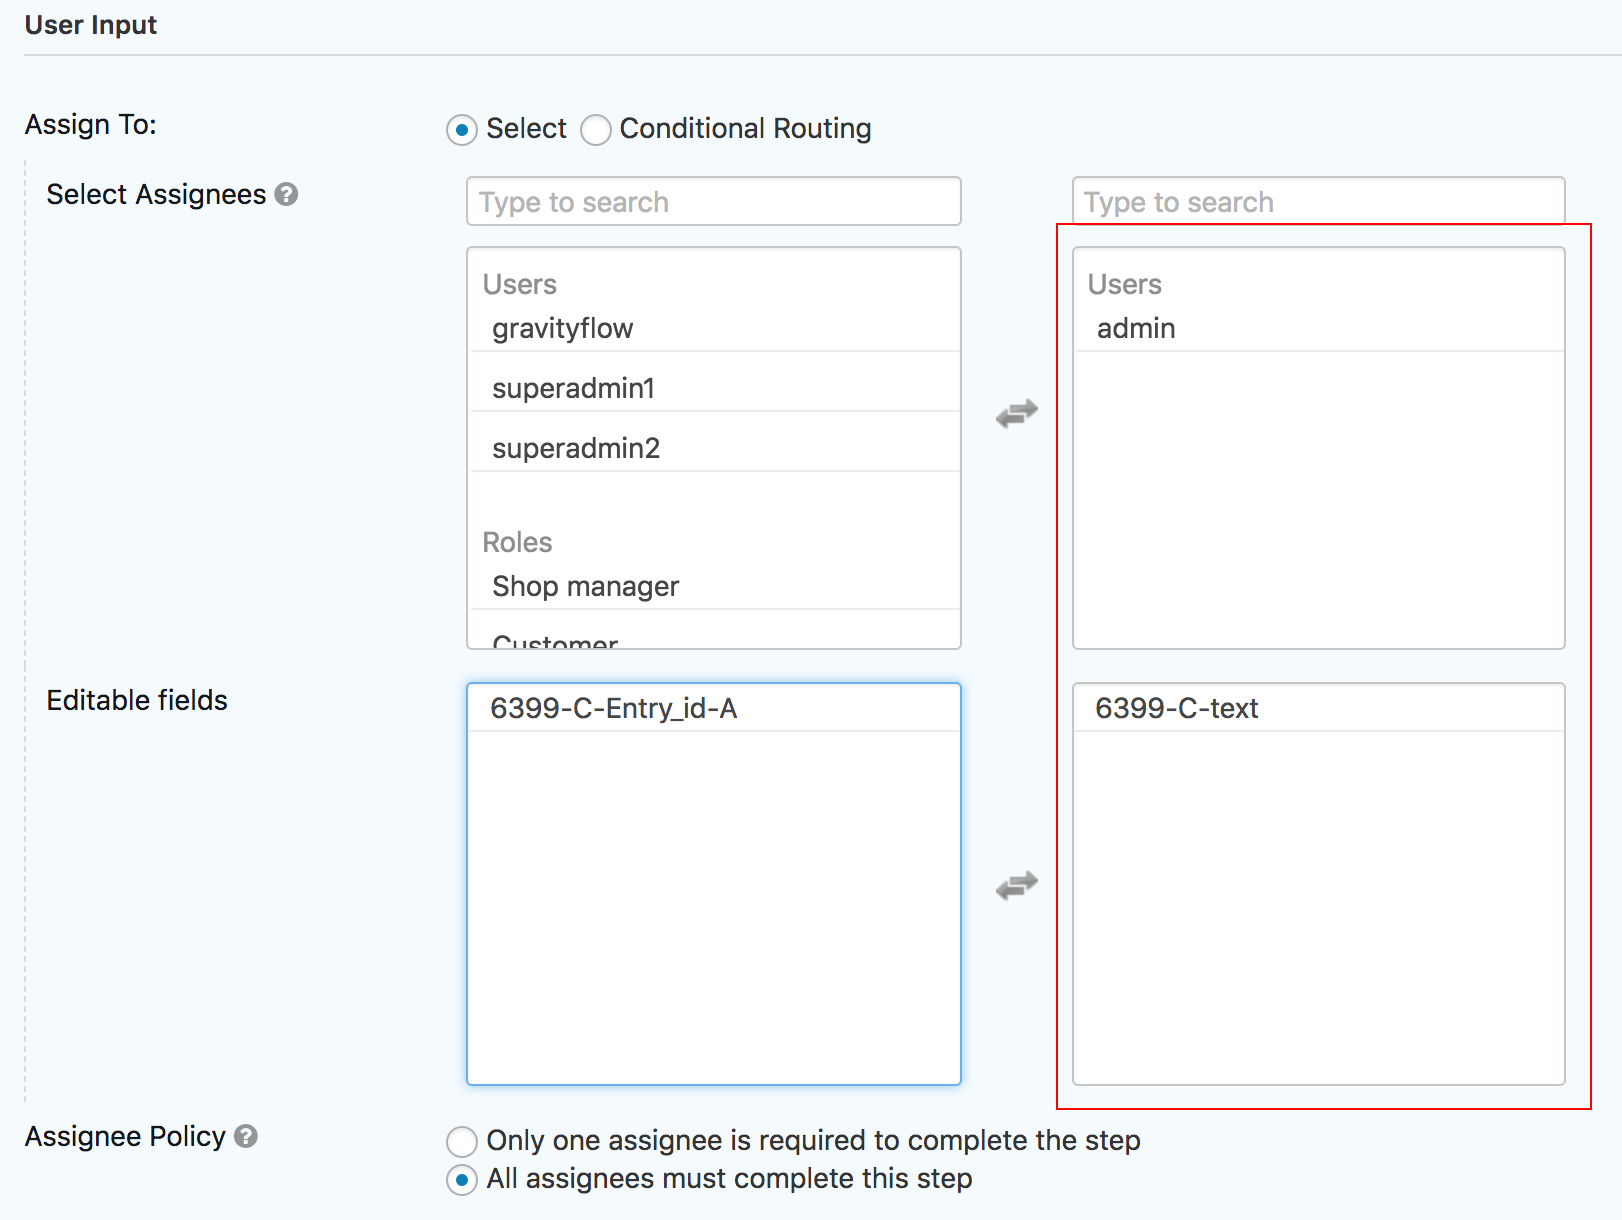
- Add the name. We used “update-6399-B” and click the “User Input” option.

- Scroll down and select the users or roles that should act as assignees when the workflow reaches this step and select the editable fields as illustrated.

- Default settings remainder of the page can be used. No further edits are required. Click the “Update Step Settings” button.

- Return to Workflow Steps and click the “Add New” button.
- Add the name. We used “6399-B-updates-6399A” and click the “Update Entry” option.

- Scroll down and replicate the same values as shown:Note: All of these values should be present in the drop-down field.

- Click the “Update Step Settings” button.
- Finally, we will add the Outgoing Webhook. Return to Workflow Steps and click the “Add New” button.
- Add the name. We used “outgoing to form A from form B” and click the “Outgoing Webhook” option.
- Scroll down and completed the fields as illustrated.
- Note: The Outgoing Webhook URL should be obtained following the steps outlined at Webhook.
 Note: At this point in the process, your Workflow for form 6399-B should look like the this (If it does not, please review the previous steps and be sure that you did not miss anything).
- Note: The Outgoing Webhook URL should be obtained following the steps outlined at Webhook.
Part III – Setting up Form 6399-C
- Click the “Add New” button.
- Add the name. We used “update-6399-C” and click the “User Input” option.

- Scroll down and select the users or roles that should act as assignees when the workflow reaches this step and select the editable fields as illustrated.
- Default settings remainder of the page can be used. No further edits are required. Click the “Update Step Settings” button.
- Return to Workflow Steps and click the “Add New” button.
- Add the name. We used “6399-C-updates-6399A” and click the “Update Entry” option.

- Scroll down and replicate the same values as shown:
 Note: All of these values should be present in the drop-down field.
 - Click the “Update Step Settings” button.
- Return to Workflow Steps and click the “Add New” button.
- Add the name. We used “outgoing to form A from form C” and click the “Outgoing Webhook” option.

- Scroll down and completed the fields as illustrated.
- Note: The Outgoing Webhook URL should be obtained following the steps outlined at Webhook. Note: At this point in the process, your Workflow for form 6399-B should look like the this (If it does not, please review the previous steps and be sure that you did not miss anything).

- Note: The Outgoing Webhook URL should be obtained following the steps outlined at Webhook.
This completes the use case. You should now have a form that meets the outlined objective.