Introduction
The Refund Order step will refund an order made either at the checkout or at a Payment or Capture Payment step in the workflow.
The Refund Order Step can be used both in a form with “Create Entry” enabled and in a form without “Create Entry” enabled. If the integration is not enabled then the form must contain an Order ID field (see below).
Important: The Refund Order step will refund the order immediately so add an Approval Step or User Input step before it, otherwise, your users can get instant refunds by submitting a form including a Refund Order Step.
Refund Order Step Settings
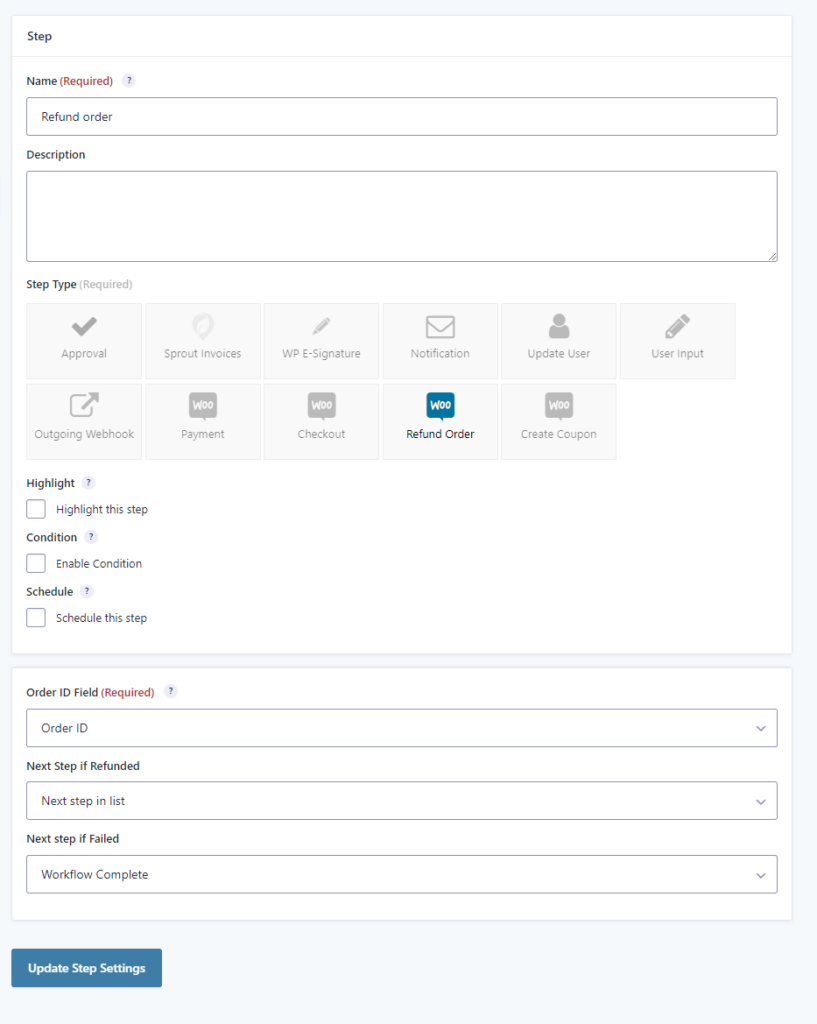
Order ID Field
Select the field containing the WooCommerce Order ID that will be refunded. Select “Entry Meta: WooCommerce Order ID” to refund the payment made for the current entry. If you’d like to refund an order in a different entry then select the field which will contain the Order ID you want to refund. The dropdown will show all Hidden fields, Text fields, and Order ID fields that are on the form. Check this document for an explanation of the Order ID field.
Next Step if Refunded
Select the next step in the workflow if the order was refunded successfully. For example, you could select a notification step and send emails to the customer and an administrator informing them that the order was refunded successfully.

Next Step if Failed
Select the next step in the workflow if the order was not refunded successfully. The most likely scenario for this is that the payment was not previously captured or if the order was already refunded. The step can also fail if the gateway API returns an error. For example, you could select a notification step and send emails to the customer and an administrator informing them that the order was not refunded successfully.
Sample Forms
The following zip file contains three separate sample forms:
- Pay Later Workflow
- Capture & Cancel Payments
- Refund Workflow
Installations instructions: download and unzip the file containing the 3 forms. Import each of the forms into Gravity Forms from the Forms->Import/Export page. After importing, you’ll need to set the assignees to the correct user on your system. Open the form settings->Workflow tab, edit the Approval step and select the user in the “Assign To” setting.