Introduction
Incoming Webhooks are a feature of the Incoming Webhook Extension, and allow entries to be created for forms by external systems.
If your workflow starts with a form submitted by a user, then you will not need this feature. You can use the Incoming Webhook Workflow Step instead to pause the workflow until an external system sends a request. See the link at the bottom of this page for further detail.
How to Set Up an Incoming Webhook to Create an Entry
An Incoming Webhook will create an entry in a form when a POST request is received at an endpoint that is defined in the feed.
An incoming Webhook can be created from the form settings page. Multiple webhooks can be added which will allow multiple systems to create entries for the same form.

Step Settings
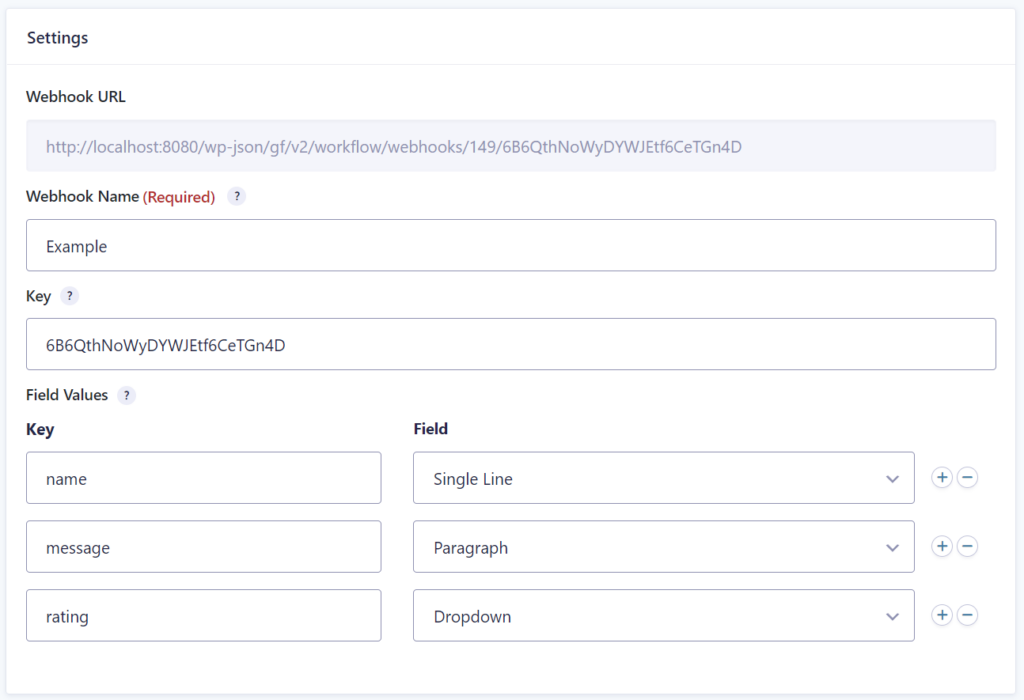
Webhook URL
This is a read-only field which displays the URL for the Webhook. It contains the ID of the webhook plus the key. Copy and paste this URL into your external system.
Webhook name
Name this webhook so you can identify it in the list of webhooks for this form.
Key
Define a unique key for this webhook. This will make the URL difficult to guess and help to keep your webhook secure. If someone gets hold of this URL they would be able to create entries. However, if this is not secure enough for your use case then you should consider adding some custom code to verify the authenticity of the request. See the Helpscout example below for further details.
Field Values
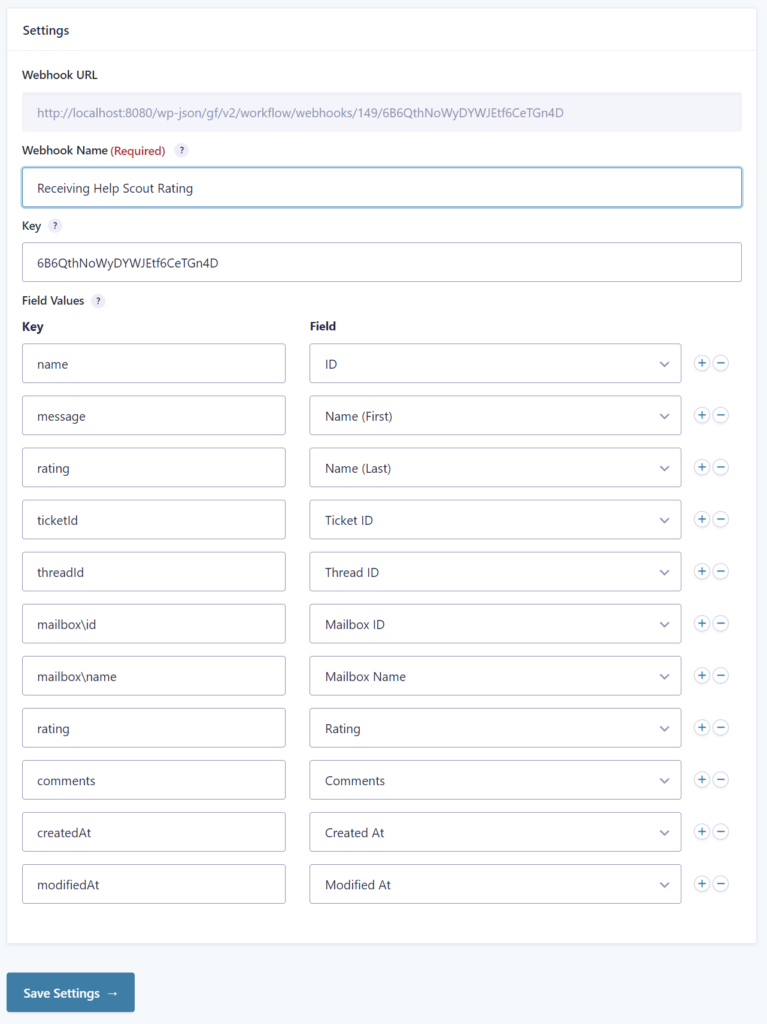
Map the keys of the values in the request to fields on the form. See the link at the bottom of this page for further details on the field mapping.
Examples
Helpscout Webhooks
The following example will create an entry an entry when a rating is received in HelpScout.

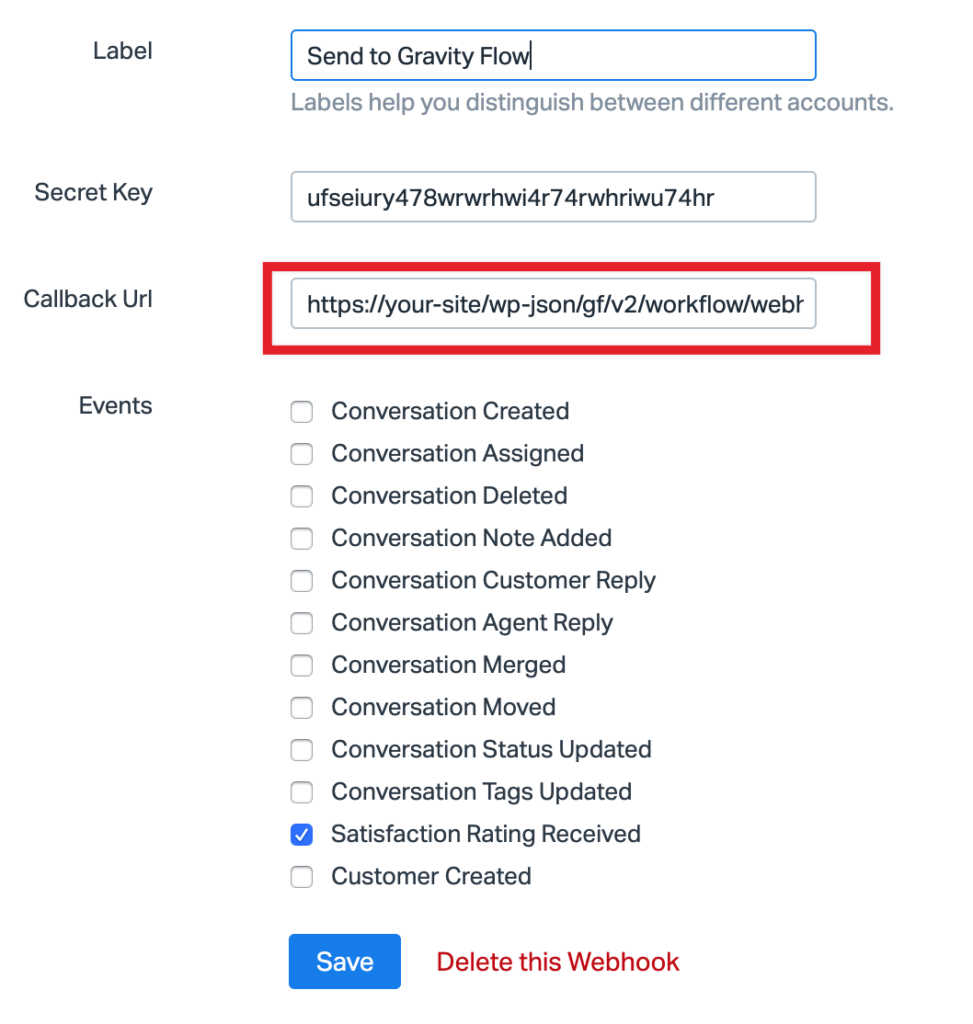
Once you have the Incoming Webhook URL you can add it to the Callback Url setting in your Helpscout Webhook app like this:

Every time you receive a rating in Helpscout, the webhook request will be sent to your Incoming Webhook URL and an entry will be created.
Once the entry has been created by the webhook, then the workflow will be triggered automatically. For example, you could add a notification step which sends an email if the rating is not “good”, and a Slack step which sends all the “good” ratings to your support team Slack channel.
Download the sample form: helpscout-ratings-webook.json
Helpscout includes a security feature for their webhooks so that you can verify the authenticity of the request by checking the hash. Here’s a snippet which will verify the request. You’ll need to add the HELPSCOUT_WEBHOOK_SECRET_KEY constant to your wp-config.php file and edit the feed ID.
<?php
// Define in wp-config.php
// define( 'HELPSCOUT_WEBHOOK_SECRET_KEY', 'the secret key' );

add_filter( 'gravityflowincomingwebhook_check_permissions', 'gravityflow_werify_helpscout_webhook', 10, 2 );

/**
 * Verify the authenticity of the Helpscout webhook.
 *
 * @param bool            $has_permission
 * @param WP_REST_Request $request
 *
 * @return bool
 */
function gravityflow_werify_helpscout_webhook( $has_permission, $request ) {

   // Replace 1 with the ID for the webhook you need to verify.
   if ( $request->get_param( 'feed_id' ) != 1 ) {
      // The request is not from Helpscout so don't override the permissions check.
      return $has_permission;
   }

   $signature = $request->get_header( 'X-HELPSCOUT-SIGNATURE' );

   $data = $request->get_body();

   $calculated = base64_encode( hash_hmac( 'sha1', $data, HELPSCOUT_WEBHOOK_SECRET_KEY, true ) );

   return $signature == $calculated;
}
Importing and Exporting
Incoming Webhooks are exported and imported automatically with the form when the form is exported and imported.