Introduction
This guide demonstrates how to use Gravity Flow and the Form Connector Extension to allow administrators to manage offline (Check) payments, update payment statuses, and manage notifications.
This approach is ideal when your form accepts both online (e.g., Stripe) and offline (e.g., check) payments, and you want to reflect payment details within the workflow interface.
Overview
The workflow process includes:
- Allowing users to choose their payment method (Credit Card or Check).
- Letting admins input the check payment details via the backend workflow steps.
- Automatically updating the entry’s payment status based on conditions.
- Optionally triggering notifications or follow-up actions only when payment is marked as “Paid”.
You can download a sample form export.
Form Setup
1. Add a Payment Method Field
The form includes a Radio Buttons field labeled Payment Method, with the following options:
- Credit Card
- Check

2. Add Payment-Specific Fields
For check payments, add the following fields:
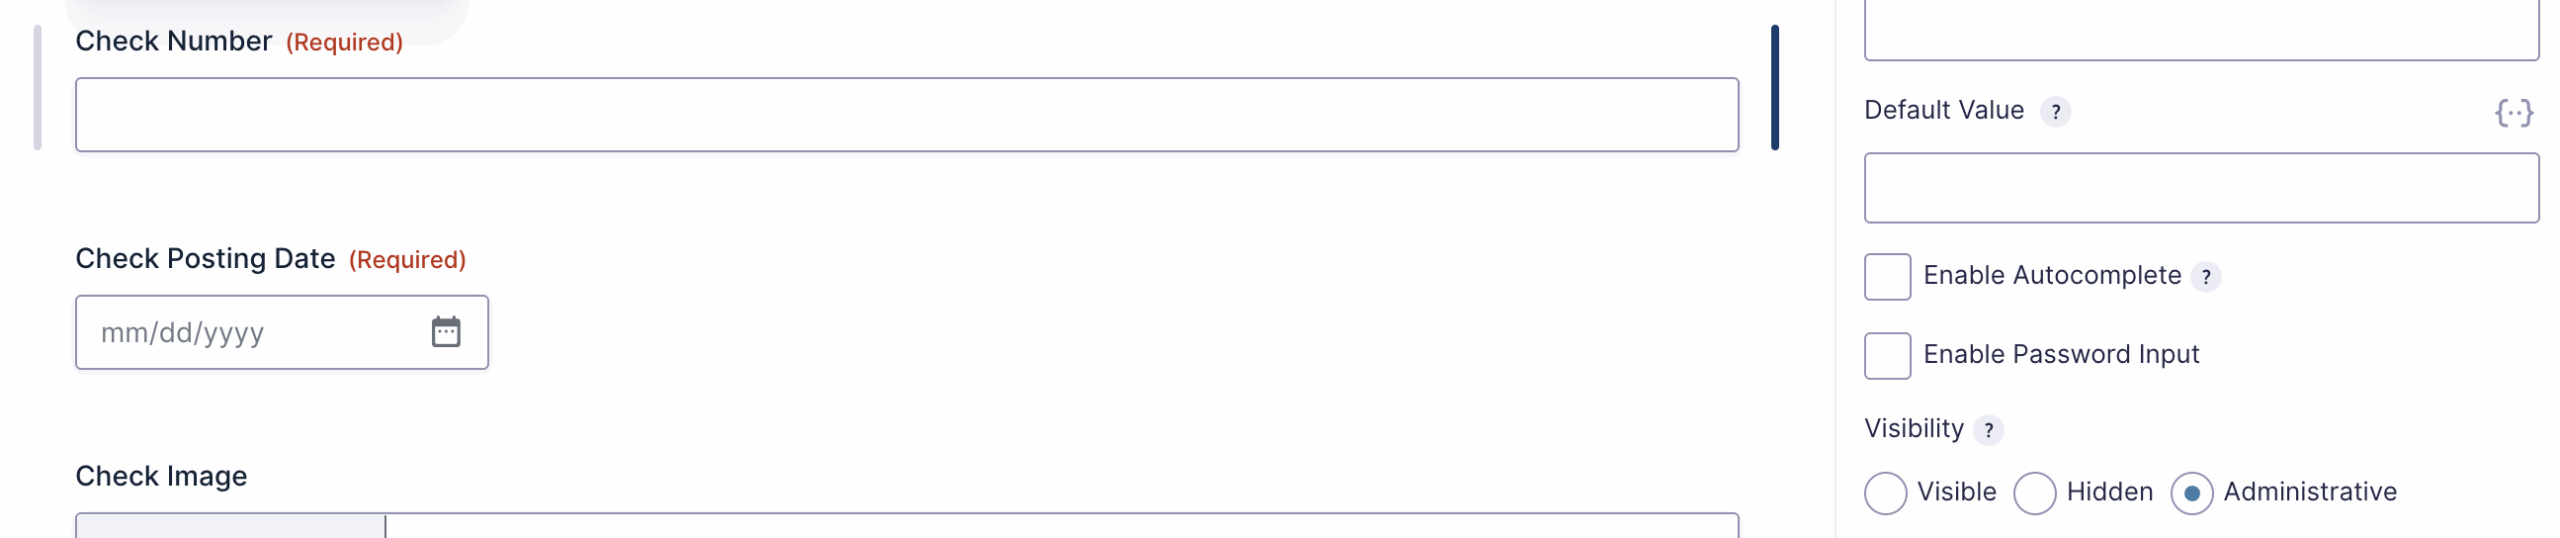
- Check Number
- Check Posting Date
These fields should be set to Administrative visibility so that only backend users can see and edit them during workflow steps.
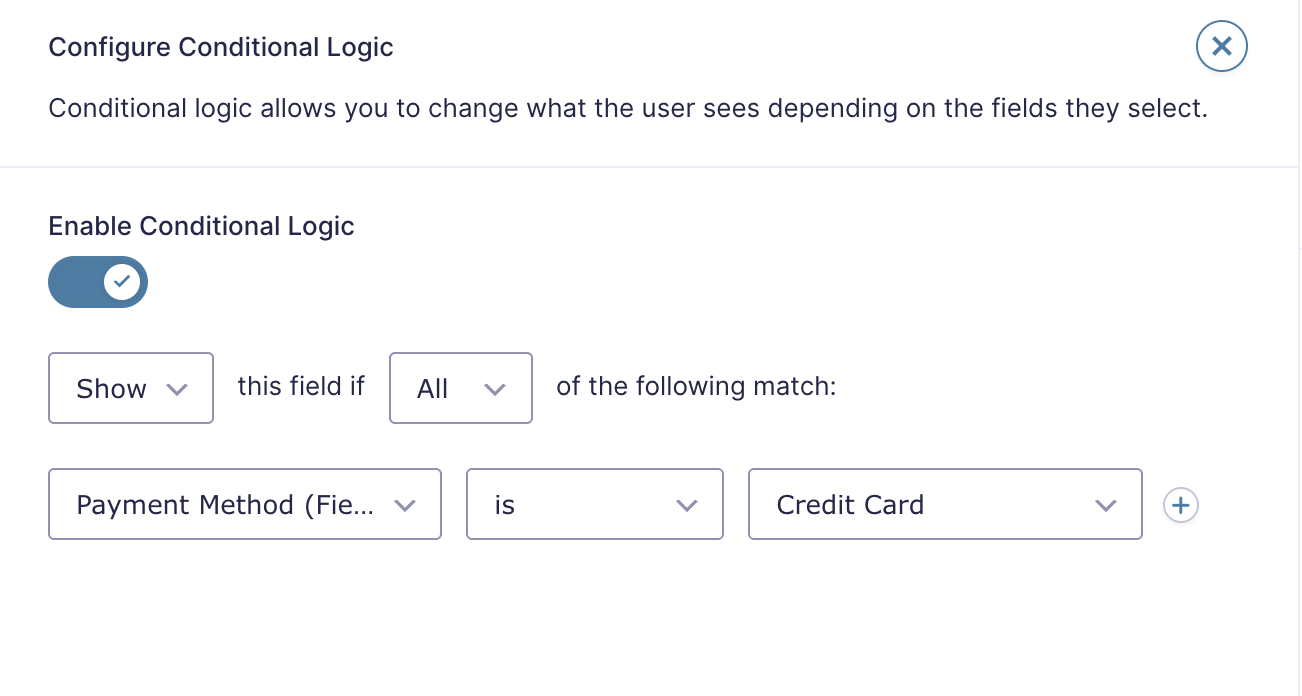
The Stripe Card field should be conditionally displayed only when “Credit Card” is selected.
Workflow Configuration
This setup includes multiple workflow steps to manage check payments and update entry detailes.
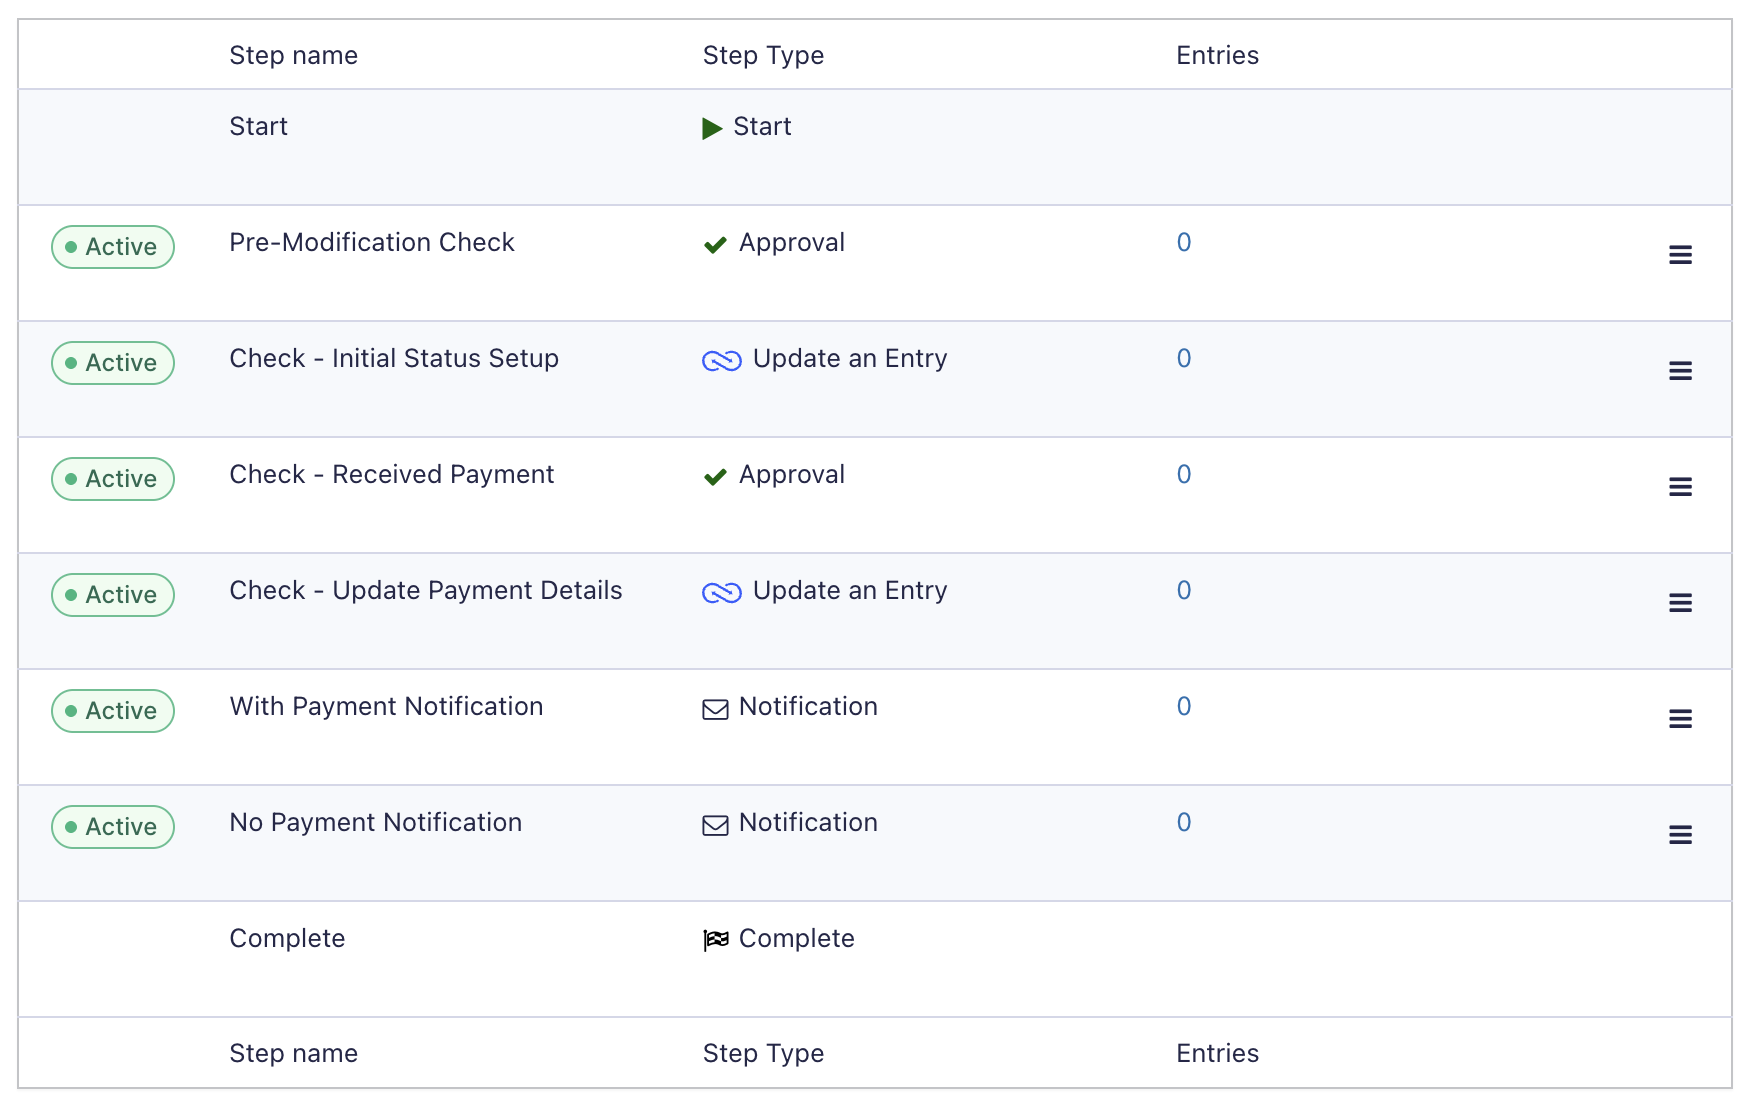
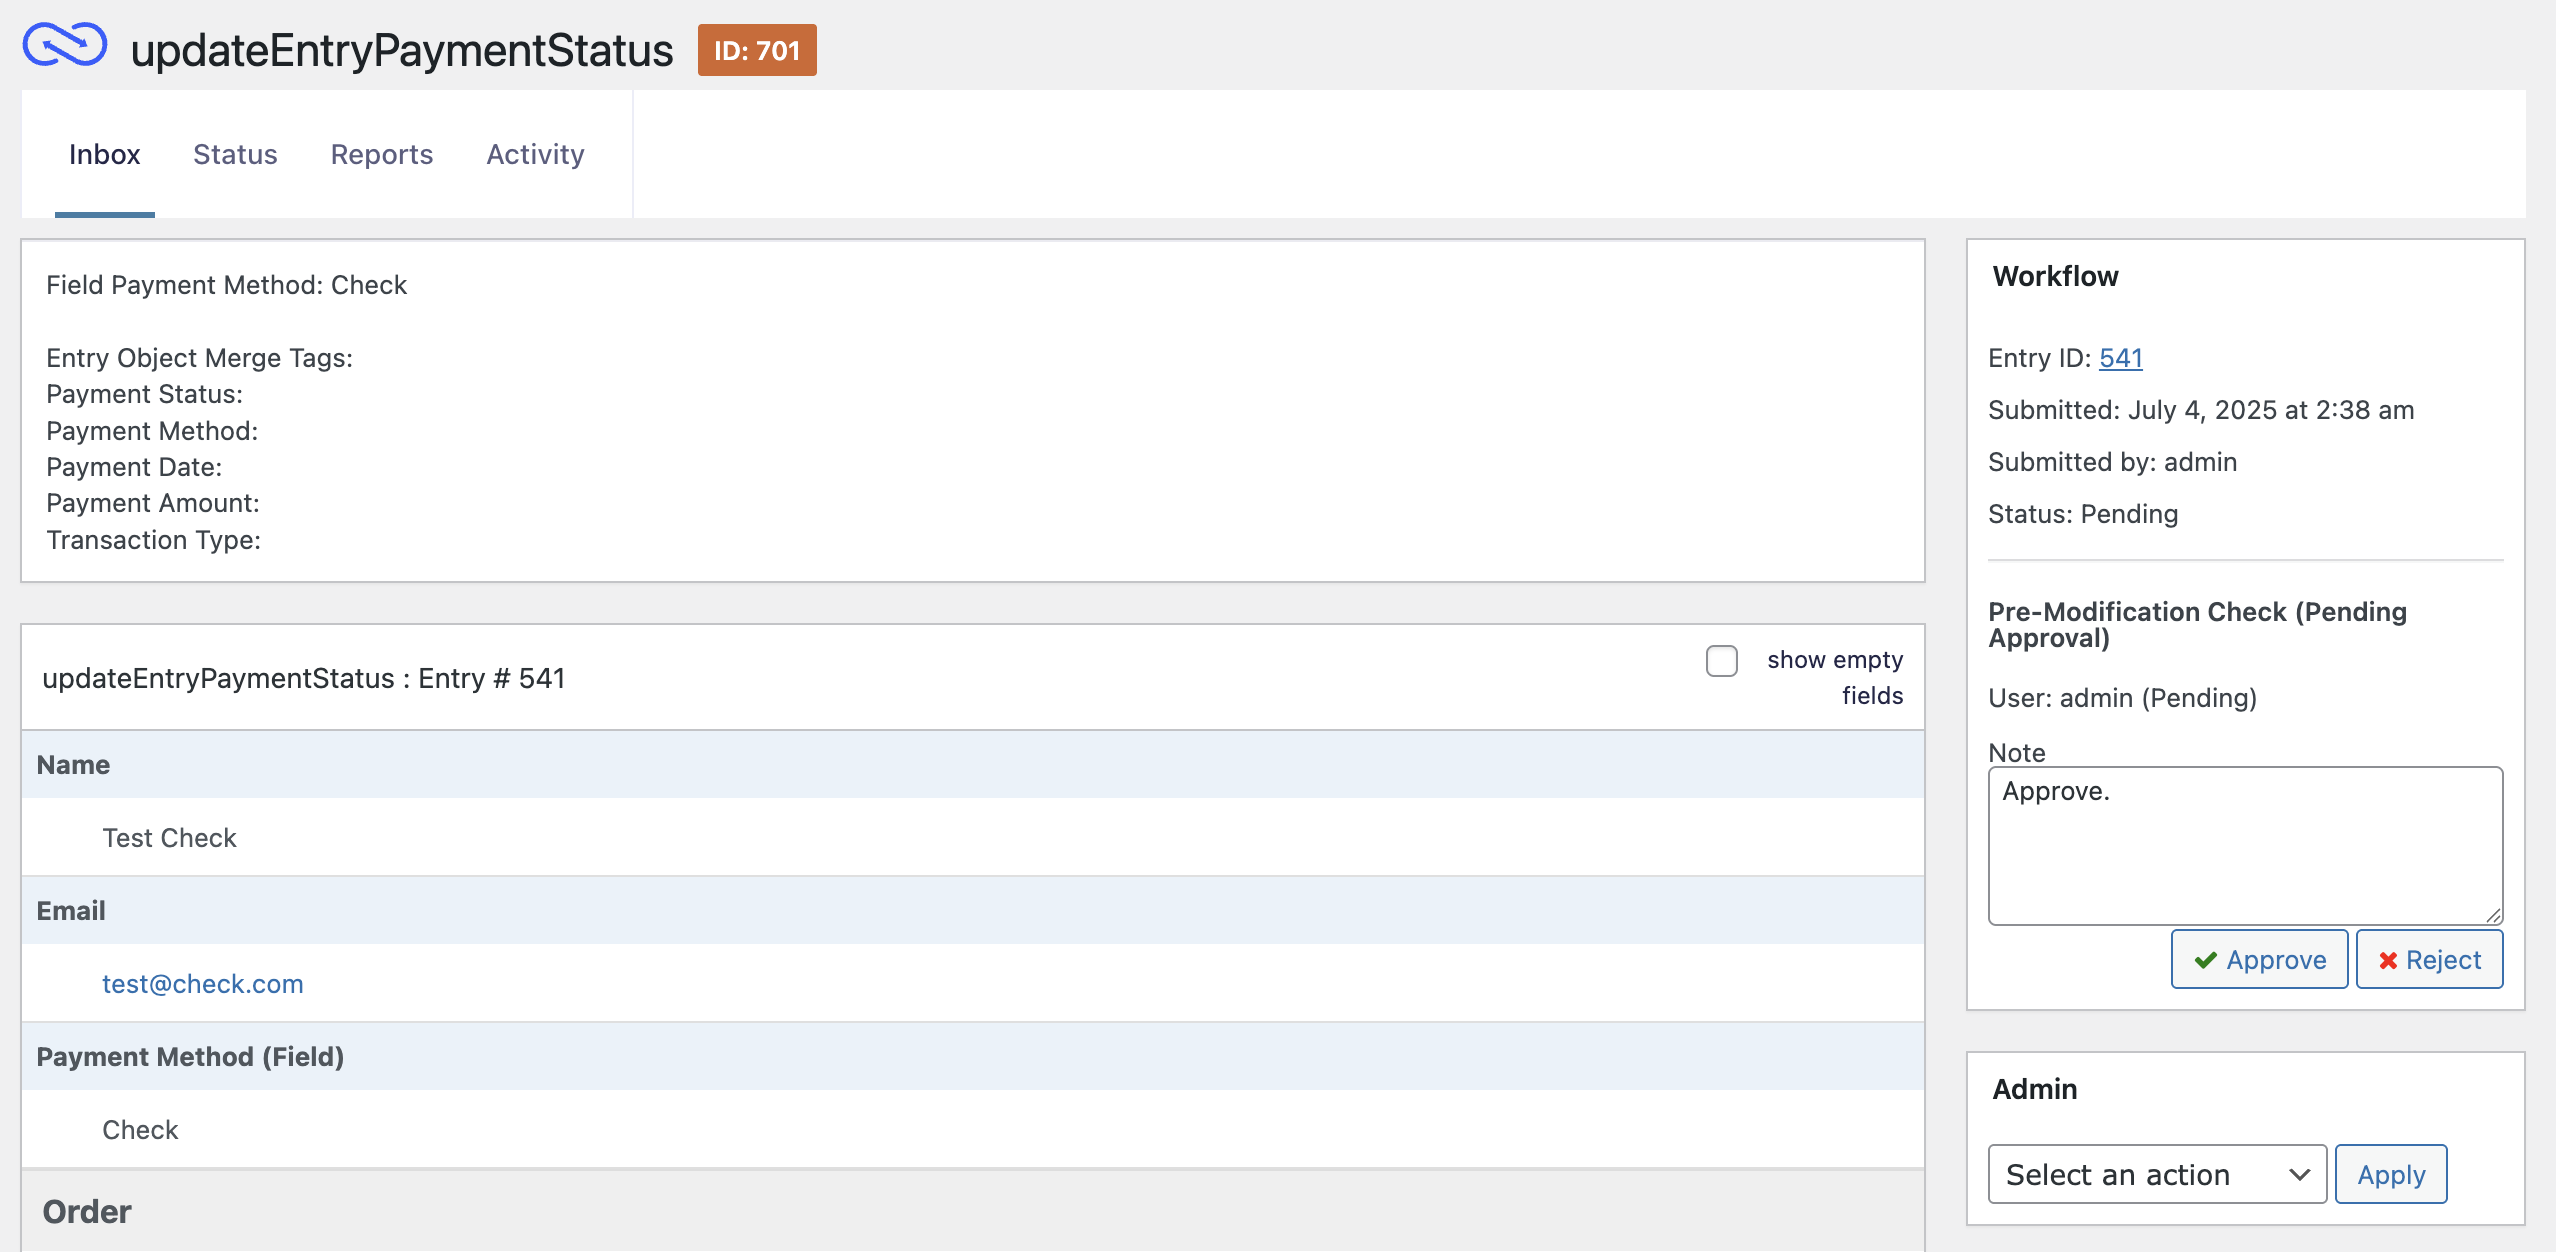
Step 1: Pre-Modification Check – Approval
- Type: Approval
- Assignee: Admin (or Treasurer or the person managing payments)
- Purpose: Manually approve the start of the check payment workflow.
- Outcome: Triggers check-related steps if approved.
Step 2: Initial Status Setup – Update Entry
- Type: Update an Entry (requires Form Connector extension)
- Name: Check Initial Status Setup
- Condition: Payment Method is “Check”
- Updates:
- Payment Status → Processing
- Transaction Type → 1
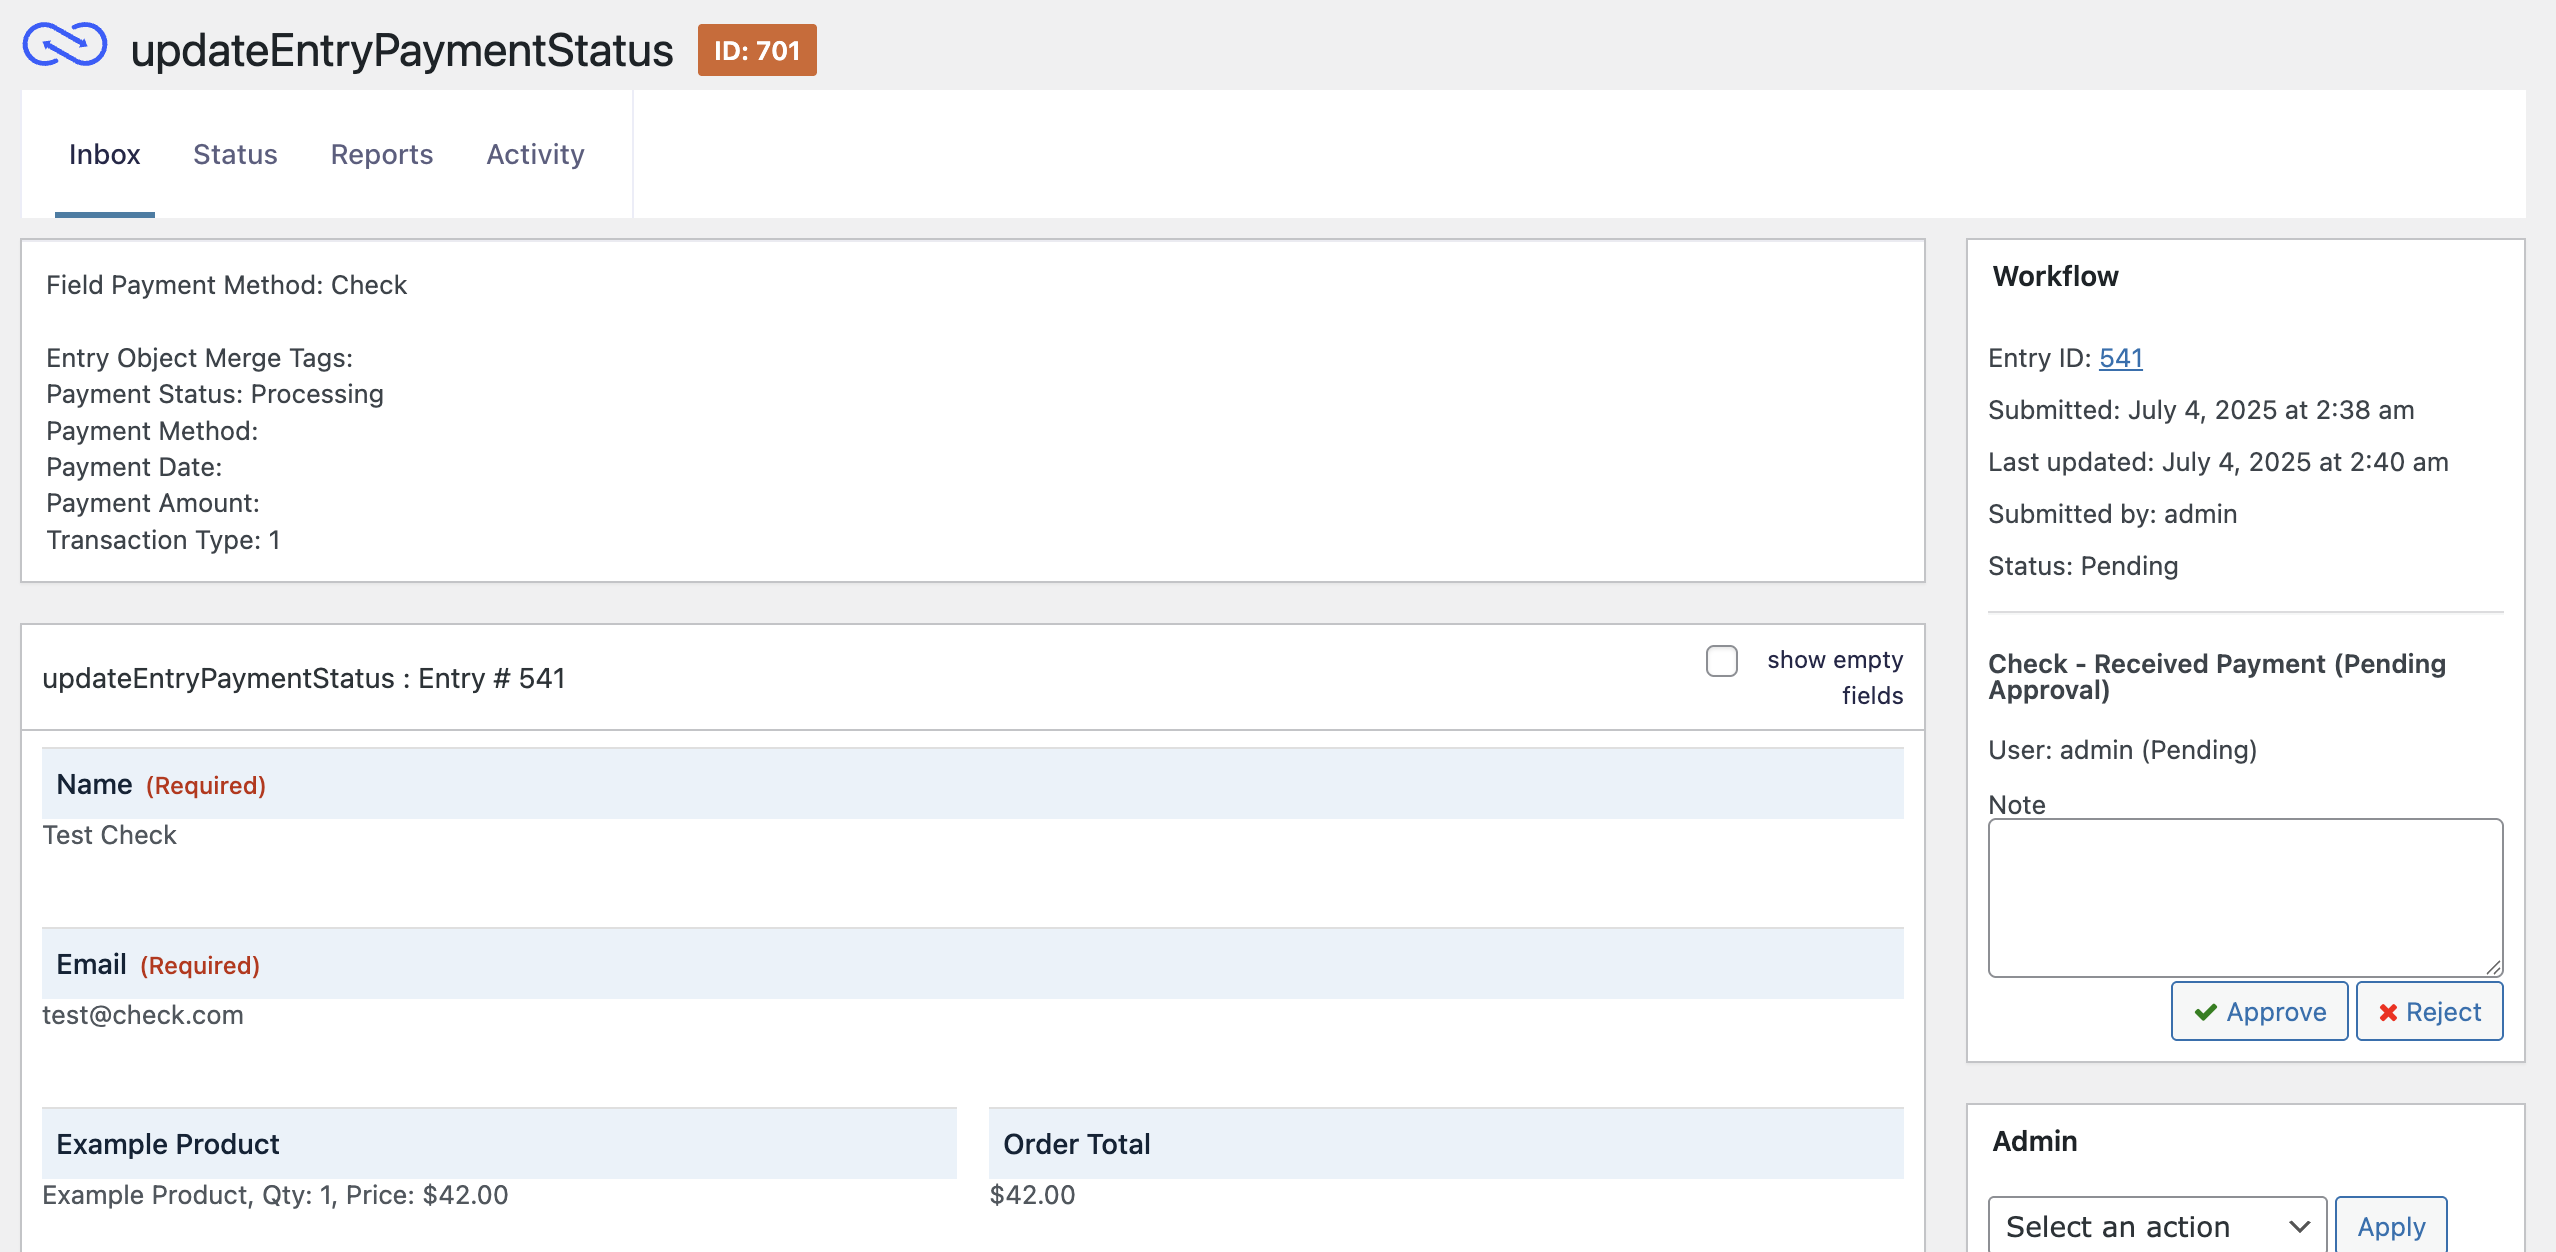
Step 3: Received Payment – Approval
- Type: Approval.
- Condition: Payment Method is “Check”.
- Assignee: Admin (or Treasurer or the person managing payments).
- Purpose: Allows entry of check details and marks payment as received.
Step 4: Update Payment Details – Update Entry
- Type: Update an Entry.
- Condition: The Previous step was approved.
- Updates:
- Payment Status → Paid.
- Payment Method → Check.
- Map fields such as:
- Check Number.
- Check Posting Date.
- Transaction Type.
- Payment Date.
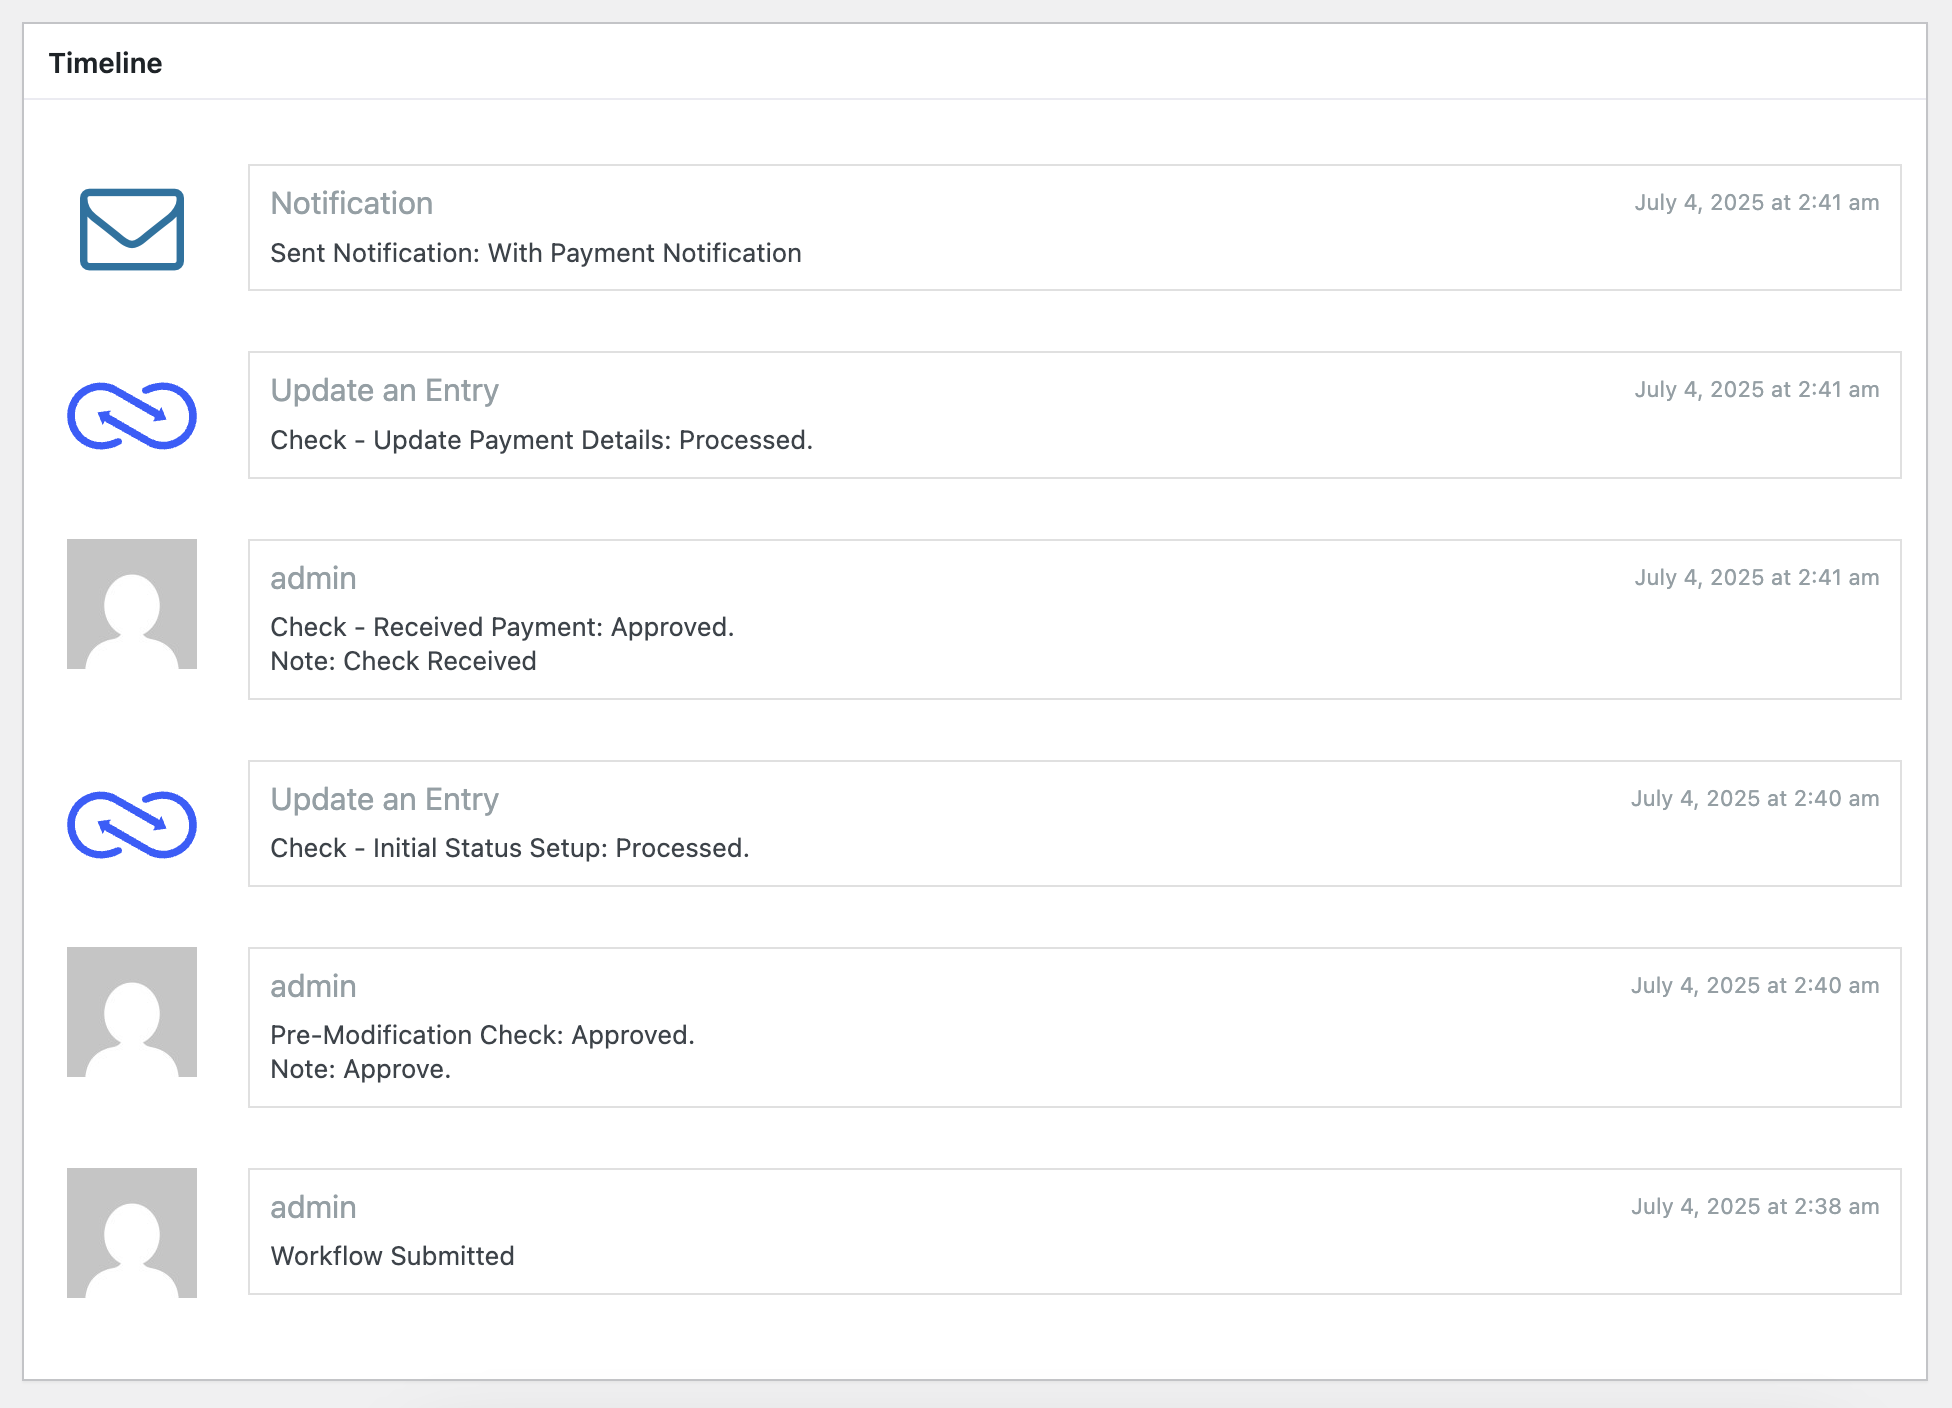
Example: Submitting a Check Payment
- A user submits the form with the payment method set to “Check”.
Workflow Status in the Entry view
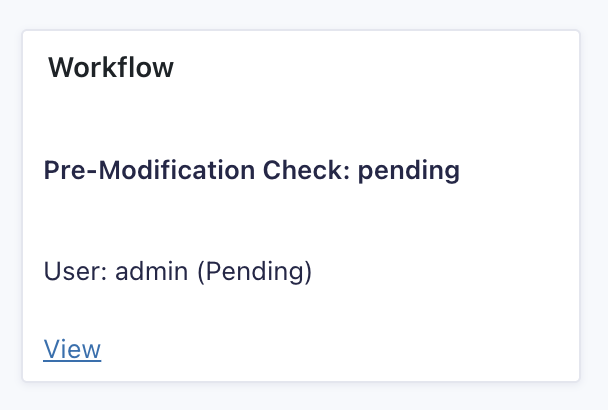
Workflow Status in Gravity Flow Inbox
- The admin approves the first workflow step.
- The payment status is set to Processing, and transaction type is updated.
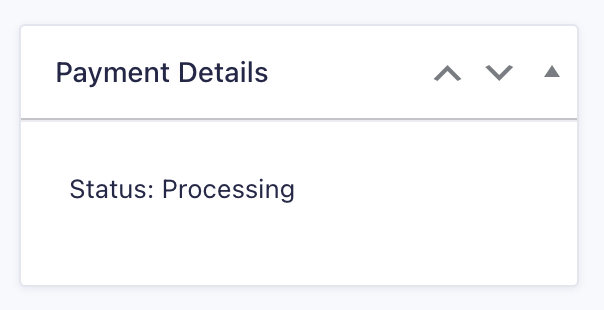
Workflow Status in the Entry view

Workflow Status in Gravity Flow Inbox
- The admin enters the check number and posting date.
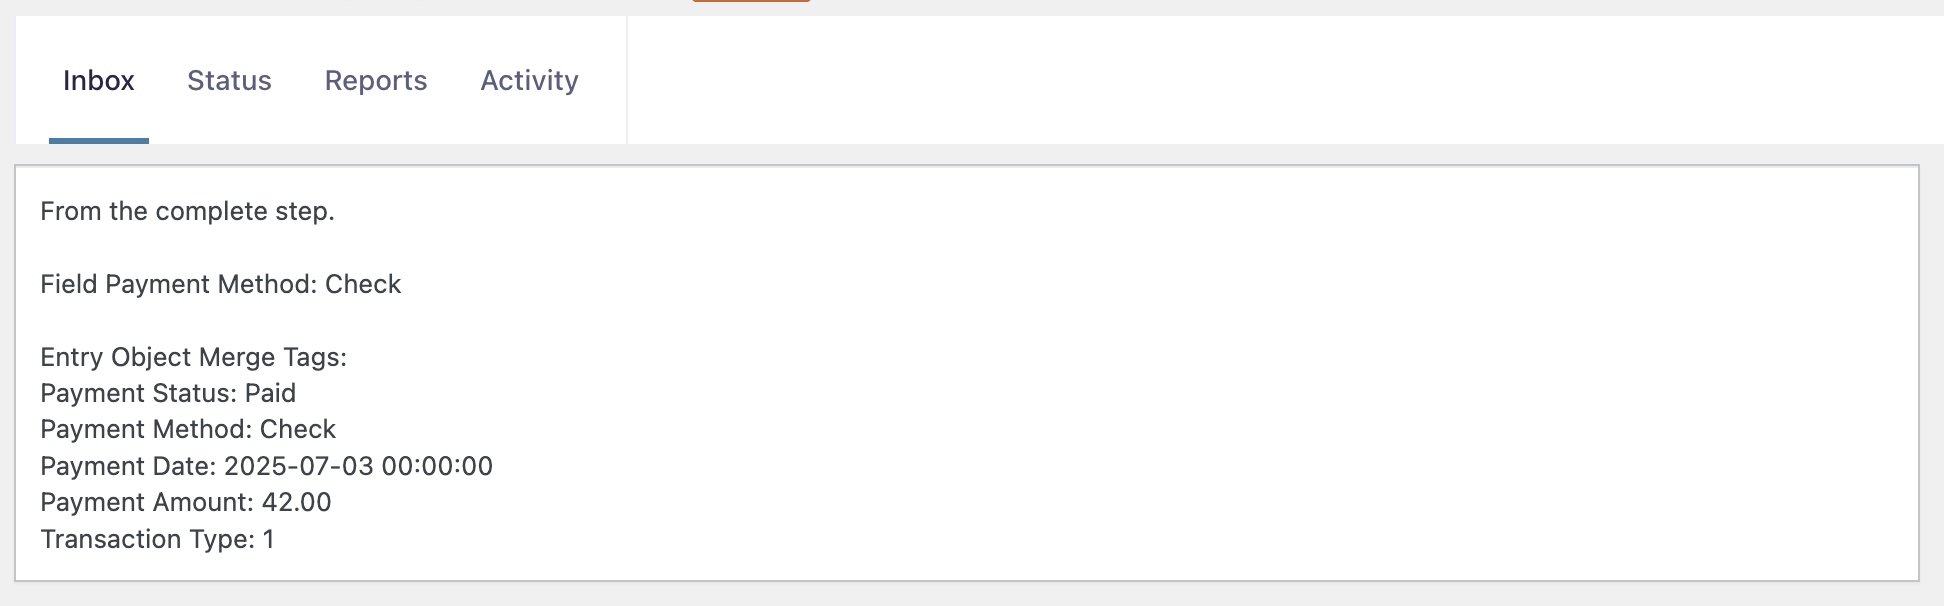
Workflow Status in Gravity Flow Inbox

- Upon final approval, the payment status is set to Paid, and all details are reflected in the entry.
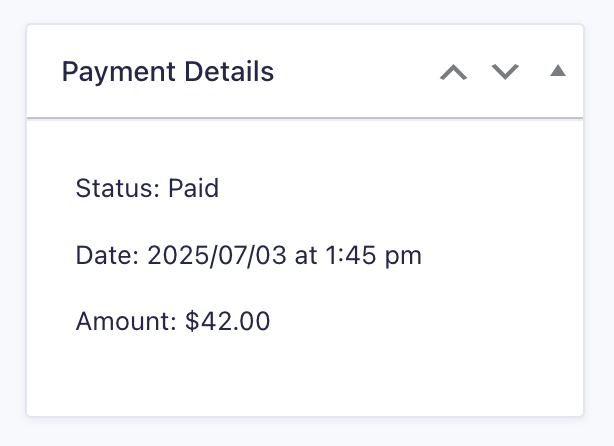
Workflow Status in the Entry view
Workflow Status in Gravity Flow Inbox
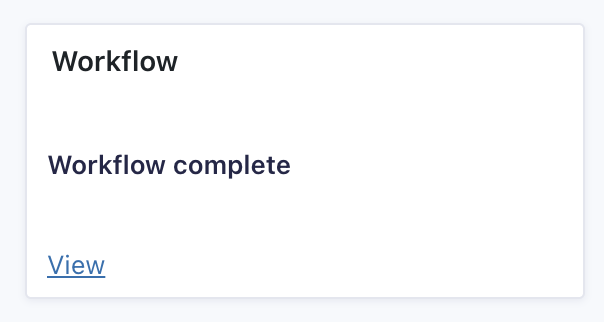
The entry timeline in Gravity Flow will show each step and the associated updates.