Introduction
The User Input step allows for capturing inputs from a user after the form has been submitted.
Add the Step and configure the step
First, create a form to use for this Workflow. Then go-to the Form Settings – Workflow tab to configure your User Input Step.

Click on the ‘Add New’ button to add a new Workflow Step. Configure the following settings to set up the User Input step.
- Give the step a Name to uniquely identify it in the list of steps.
- Select ‘User Input‘ from the Step Type setting.
- Assign the entry to the user whose input is required in the Select Assignees setting. Click on the user in the list of users on the left to move it to the list of assignees on the right. Instead of scrolling through the list of users, you can lookup the user by typing the user name in the search box. The Ajax search triggers if the number of users is more than 150. This can be configured with the hook gravityflow_assignee_ajax_search_account_threshold
- Define which of the fields should be editable by clicking on the field in the list on the left to move it to the list of editable fields on the right.
- If any of the fields have conditional logic, then the “Enable field conditional logic” setting will be available. Leave this setting deactivated to override the conditional logic and display all the selected editable fields.
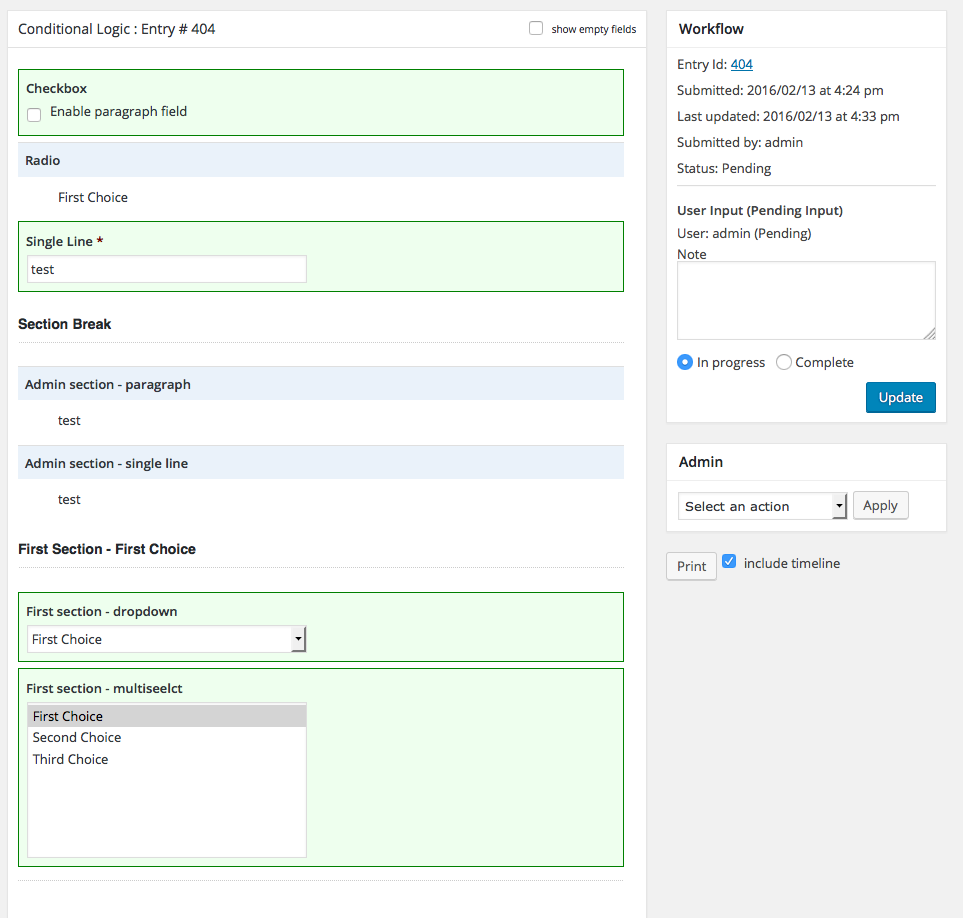
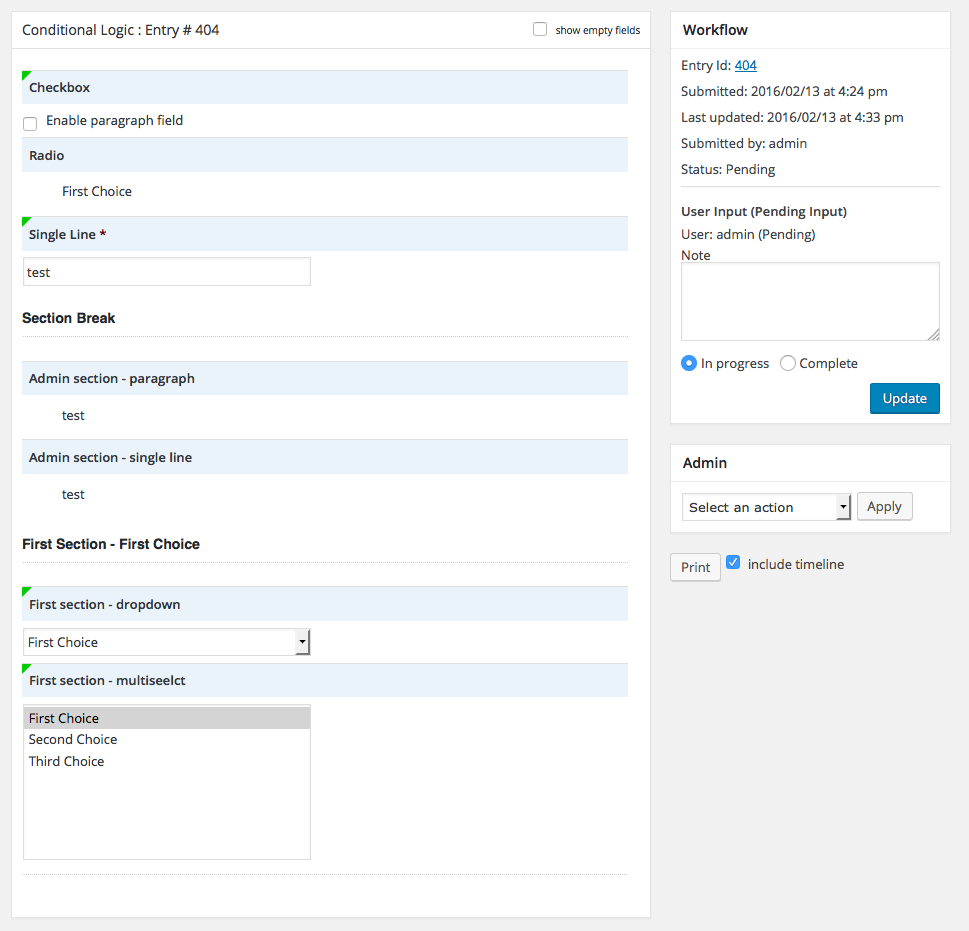
- The editable fields will be highlighted if the “Highlight Editable Fields” setting is selected. Options for highlighting are green triangle and green background.
- Select the appropriate assignee policy.
- Optionally add instructions to the top of the page for this step.
- Select the display fields that should appear on this step.
- Select the option for the default status. User Input Steps can be submitted immediately (complete) or saved for later (in progress).
- The Workflow note is a special field above the ‘Update’ button. The content of this field is not stored in the entry, it’s added to the timeline. You can choose to make the note required depending on the status.
- If the Email setting is enabled, an email will be sent to the assignee informing them that there is a task pending in their inbox. Enable the reminder setting to resend the email after a specified number of days.
- The expiration setting allows you to set a time limit for this step.
- Select the next step in the Workflow once this step is complete. If there are no more steps in the list, then the Workflow will be complete.

Example Screenshots of the User Input step
Editable fields highlighted with a green background

Editable fields highlighted with a green triangle

Scheduling Steps
All steps can be scheduled to begin after a specific delay or on a specific date. The entry will be ‘queued’ until it’s time to start the step.

Step Expiration
User Input Steps can be scheduled for expiration. Once a step expires, the entry will be sent to the step configured in the Next Step setting(s). The Expiration settings in the User Input Step allow for the status to be specified once the step has expired.
Step Due Date
User Input steps can have a due date specified. Once a step has passed the due date, the entry will be highlighted with the chosen color on any inboxes. 
The due date can also be communicated through the {current_step} merge tag modifiers {current_step:due_date} and {current_step:due_status}.
Display Instructions
The instructions setting not only provide a place to inform an assignee of key details they must complete within the step, but for large workflows or business processes that take place across multiple forms they can be a great place to put a status table or graphic. These are helpful for new users of your site as well as those who interact with a high volume of entries to quickly understand the current status/context. Including similar status details in notification messages can reinforce what the entry submitter can/should expect as their entry moves from submission to completion. A few examples:
