
Introduction
Gravity Flow provides a way for business process owners to implement their own workflow processes using simple drag and drop configuration.
The purpose of this introduction is to give you a sense of how Gravity Flow works so you can start piecing together in your mind the different features you’ll need to configure your workflow.
The End-User Experience
The UI works perfectly in the dashboard but it also works equally well in the front-end pages of your site using either blocks or the shortcode. This allows you to use your theme’s styles and let external users participate in the workflows.
Gravity Flow includes a complete user interface which works out-of-the-box without any configuration beyond assigning appropriate permissions to users. This UI is a top-level WordPress admin menu section entitled Workflow. The following sub-menu items include:
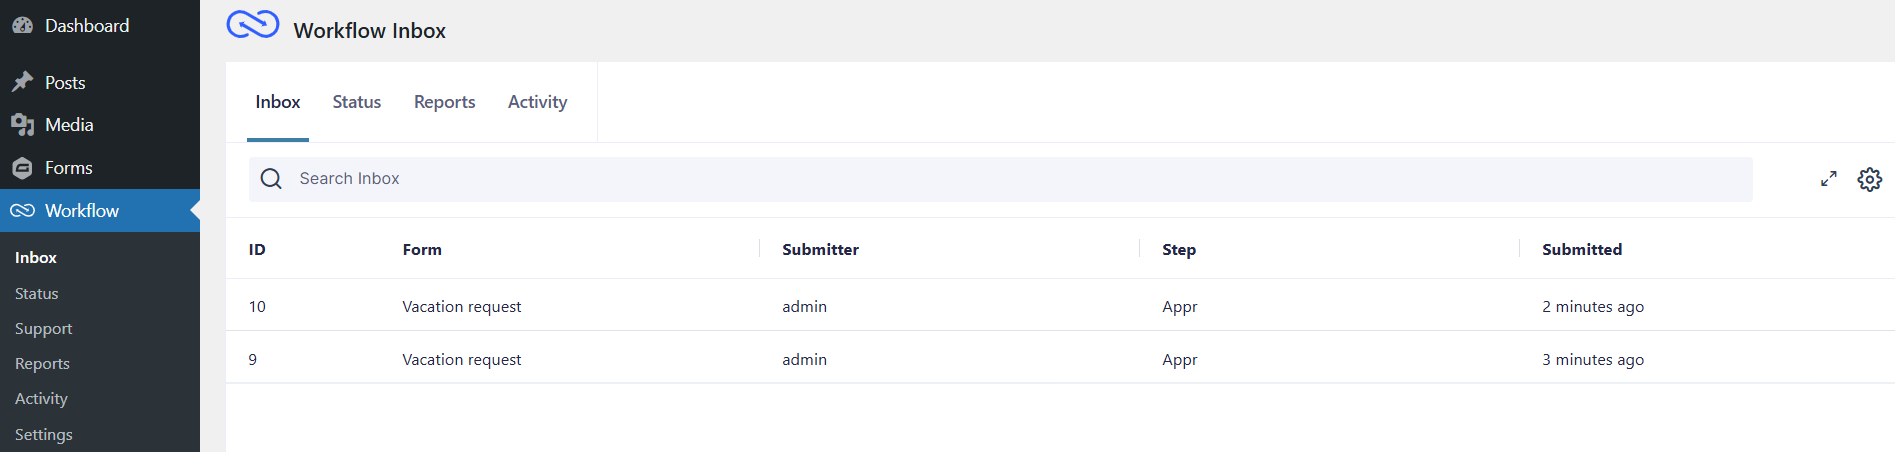
- Inbox: This is where users come to perform their pending tasks such as approval or input.
- Submit: A central place to publish all your workflow forms. Users select the form they’d like to submit. The administrator can decide which forms to publish on the submit page.
- Status: The repository for workflow entries. Entries can be filtered by id, form, date and status.
- Activity: A log of everything that happens and how long it took.
- Reporting: Displays charts for completed workflows and average duration by month, step, and assignee to help you identify potential bottlenecks in your processes – in real time.
An example of the inbox with a couple of vacation requests pending approval.
An example of the submit page with just one published Workflow Form:

An example of the Status page with just two workflow entries.


See the documentation on permissions to see how to give users access to these pages.
You don’t have to use this built-in admin UI if you don’t want to. Each of these pages is available via a shortcode so you can use them in the front-end.
Example of the detail page in the front-end using the Kadencce theme:

See the documentation on the Gravity Flow Blocks or [gravityflow] shortcode for further details.
Workflow Steps
Gravity Flow processes are built using Workflow Steps. Each Step is responsible for controlling a set of tasks such as approval, user input, sending notifications or integrating with third-party systems such as MailChimp. The following steps are built-in to Gravity Flow:
- Approval – Read more about configuring a simple approval process.
- User Input – See an example of a user input step.
- Notification – Sends any of the Gravity Forms notifications.
- Outgoing Webhook – Send data to other systems via API calls and map data back into the entry.
You can add as many steps to your process as you like, and use each step type as many times as you need.
If you’ve had experience coding or designing your own workflows based around a status field, you might find the transition to the paradigm of steps tricky at first. Gravity Flow handles the management of the status for you so you can concentrate on the flow of the process.
Gravity Forms Add-On Based Steps
Gravity Flow also integrates with any feed based step that a Gravity Forms Add-On provides by triggering selected feeds at the appropriate moments in your workflow. Some examples include:
- User Registration
- MailChimp
- Campaign Monitor
- Zapier
- Emma
Gravity Flow Extensions
We also offer additional optional functionality through extensions. For example:
- PDF Generator
Design your PDF using merge tags, generate it at the right moment and send it by email. - Form Connector
Creating, updating or deleting entries in other forms so you can join two workflows together and create workflows that run in parallel. - WooCommerce
Trigger workflows after a WooCommerce order is created.
You can browse all the extensions that Gravity Flow has available along with the documentation covering how to setup each extension to get the most value out of it as a part of your workflows.
Creating a Custom Step
If your workflow requires a custom step, then new Step extensions can be developed easily using the Gravity Flow step framwork. Workflow Steps are form-specific, so they are configured in the workflow tab on the form settings page for each form. Here’s an example of a vacation request workflow involving an employee, department managers, and the HR department:
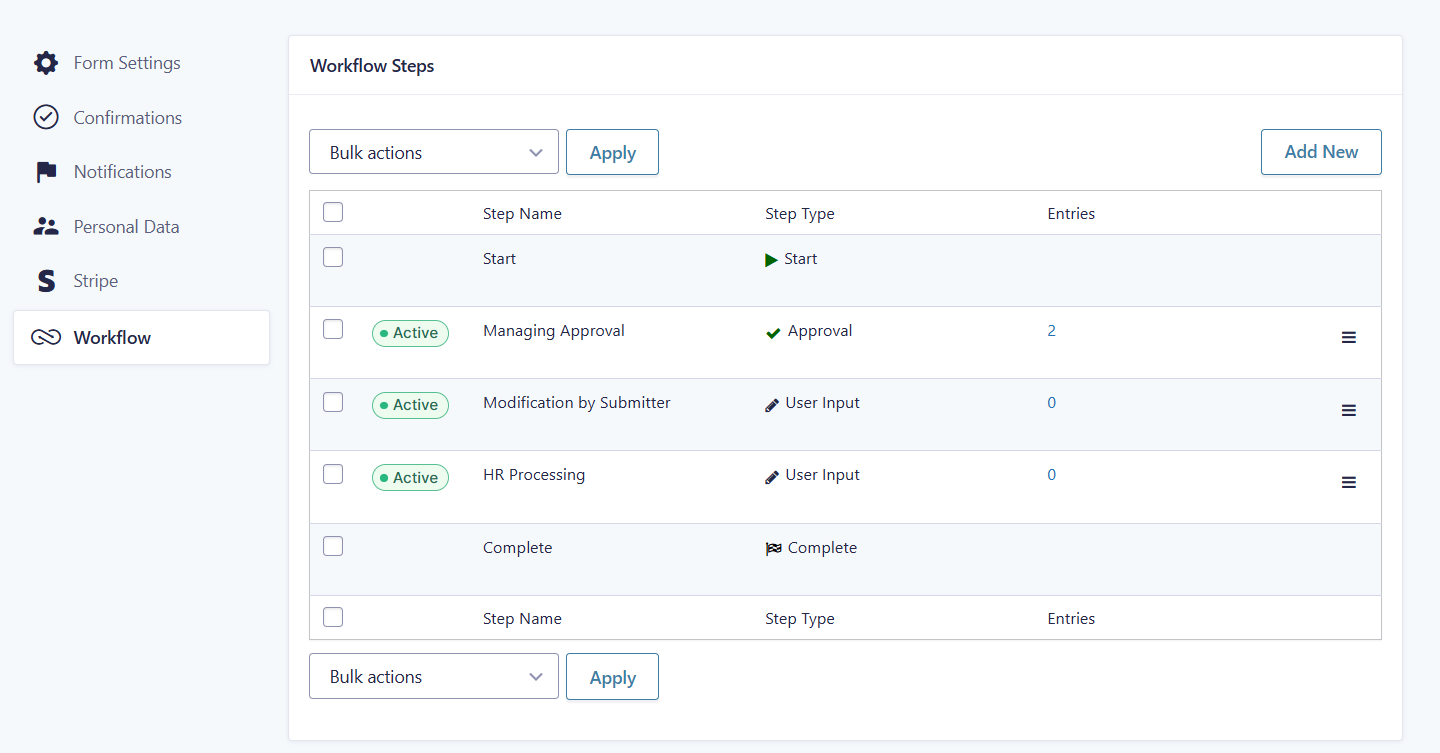
Read the Vacation Request walkthrough for further details on how to implement this process.
Step switcher
The Step Switcher, located above the Step Editor, allows you to jump to any step in the workflow for editing.

Bulk actions
Use the Bulk Actions dropdown to select multiple workflow steps and mark them as Active, Inactive, Duplicate, or Delete.

Workflow Fields
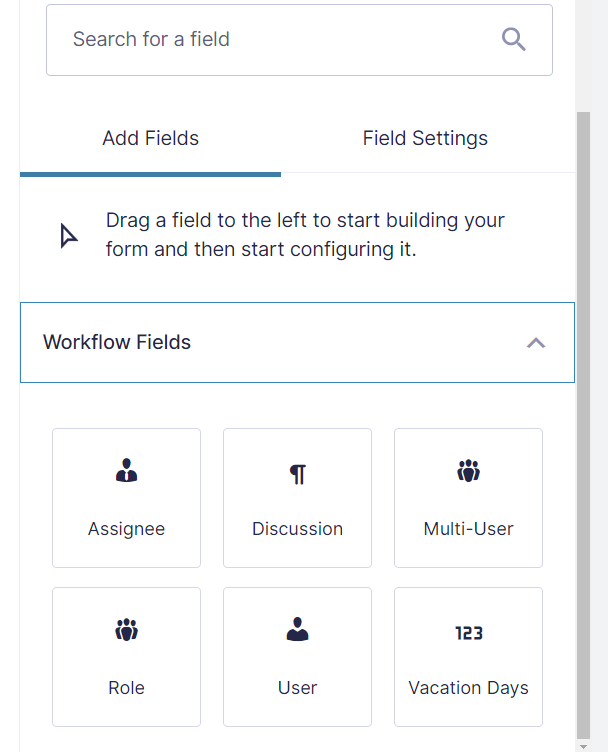
Gravity Flow provides several field types, available in the Workflow Fields section of the Gravity Forms Form Editor, to make capturing data or assigning steps to the right resource simple. An important one to understand when you first start to use Gravity Flow is the assignee field.
The Assignee Field
In some processes it’s not possible to know who should be assigned to a step or an email until the moment the form is submitted or another step in the workflow. In these cases we have a couple of options. One way to do it is to let the user to decide exactly who should be assigned. The Assignee Field is a field that can be added to a Gravity Form which can be used to allow users choose from a list of roles and users. The Assignee Field can then be used in the configuration of the approval or user input steps.
You can find the Assignee Field in the Workflow Fields section of the Gravity Forms Form Editor.
The Assignee Field can also be used as the destination for emails in some steps such as the approval and user input steps.
Read the documentation on the Assignee Field for further details on how to implement it in your workflow.
Conditional Routing
Another way to configure dynamic step assignment is to configure routing. Routing works the same way as routing in Gravity Forms Notifications. It looks like this:

In this example, the step is assign to a different manager (WordPress user account) depending on the value of the Department field (Dropdown).
Workflow Emails
Workflow Emails are similar to Gravity Forms Notifications except they are tied to a step and will be triggered only in that step. The following steps allow emails to be configured for different events:
- Assignee Email
- Rejection Email
- Approval Email
- Assignee Email
Emails can be sent to:
- a specific WordPress user account.
- a specific WordPress role. Note the email will be sent to all users in the role so take care to select the correct role.
- a user or role specified in an Assignee Field.
- an email address entered in an email field.
- the user who submitted the form. (Only enabled when the form setting ‘require user to be logged in’ is activated.)
- conditional routing (see above)
It’s also possible to configure Gravity Forms Notifications by using the event setting along with the conditional logic setting. Gravity Flow adds an event for each step type and an event for Workflow Complete:

Next Steps
There are often many ways to implement the same workflow so once you’re aware of each of the features you’ll be able to get more creative with your solution. Take a look at the walk-through on vacation requests.