
Overview
The Choice Routing step automatically directs an entry to a specific next step based on the value selected in a form field. It is designed to branch a workflow without requiring any user interaction. As soon as the step is processed, the entry is routed immediately based on the submitter’s choice.
Note: The key advantage of the Choice Routing Step is the ability to map multiple field choices to a single destination step. Rather than creating a separate step conditional logic for every possible field value, you can group related choices into one row and point them all to the same next step. This keeps your workflow settings clean and easy to maintain as your form evolves.
Step Settings
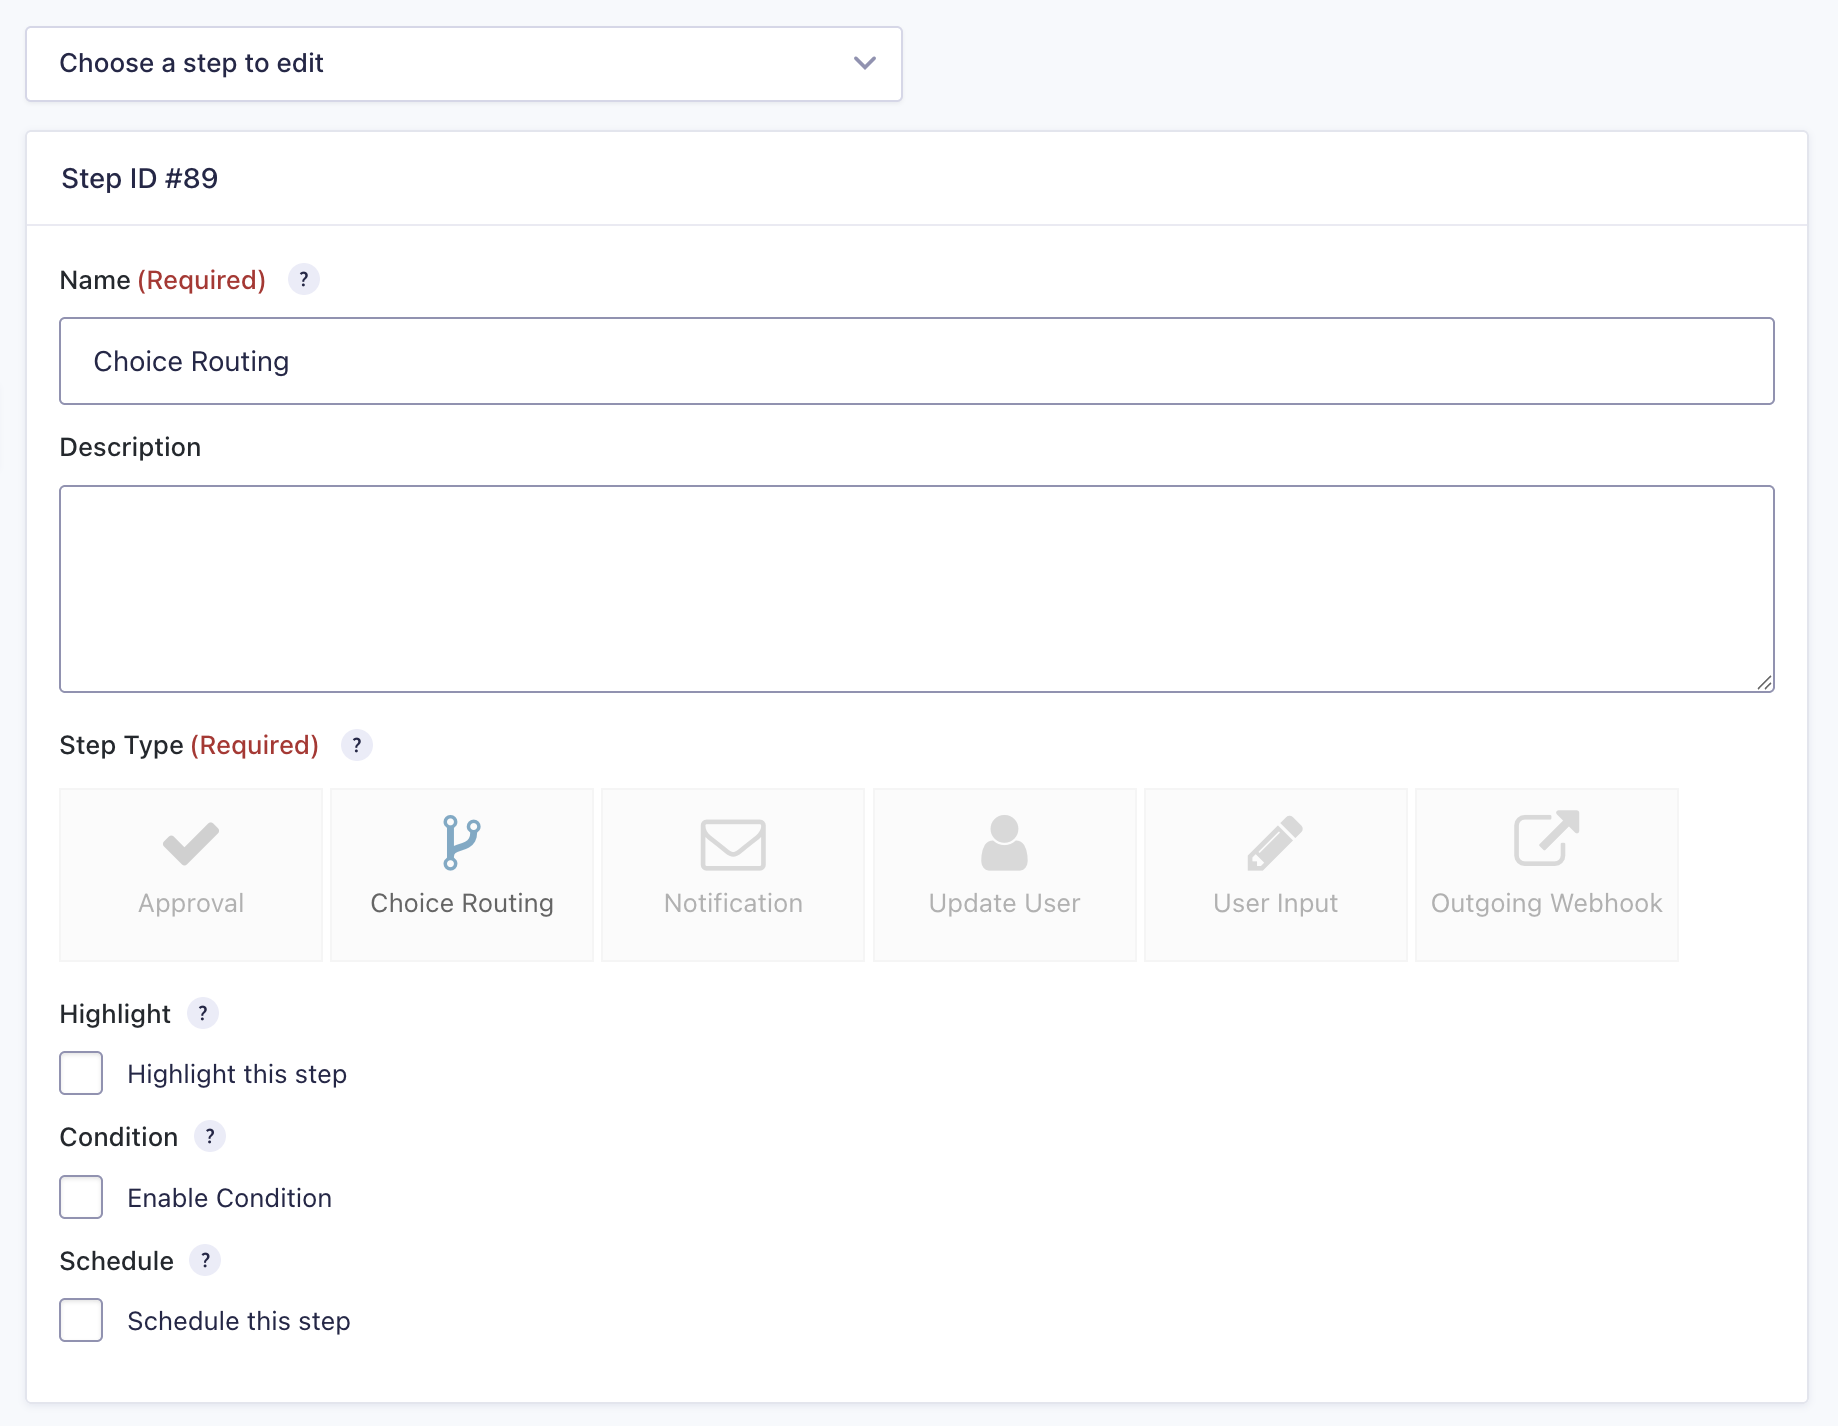
A Choice Routing step type can define the following settings, in addition to the common step settings.
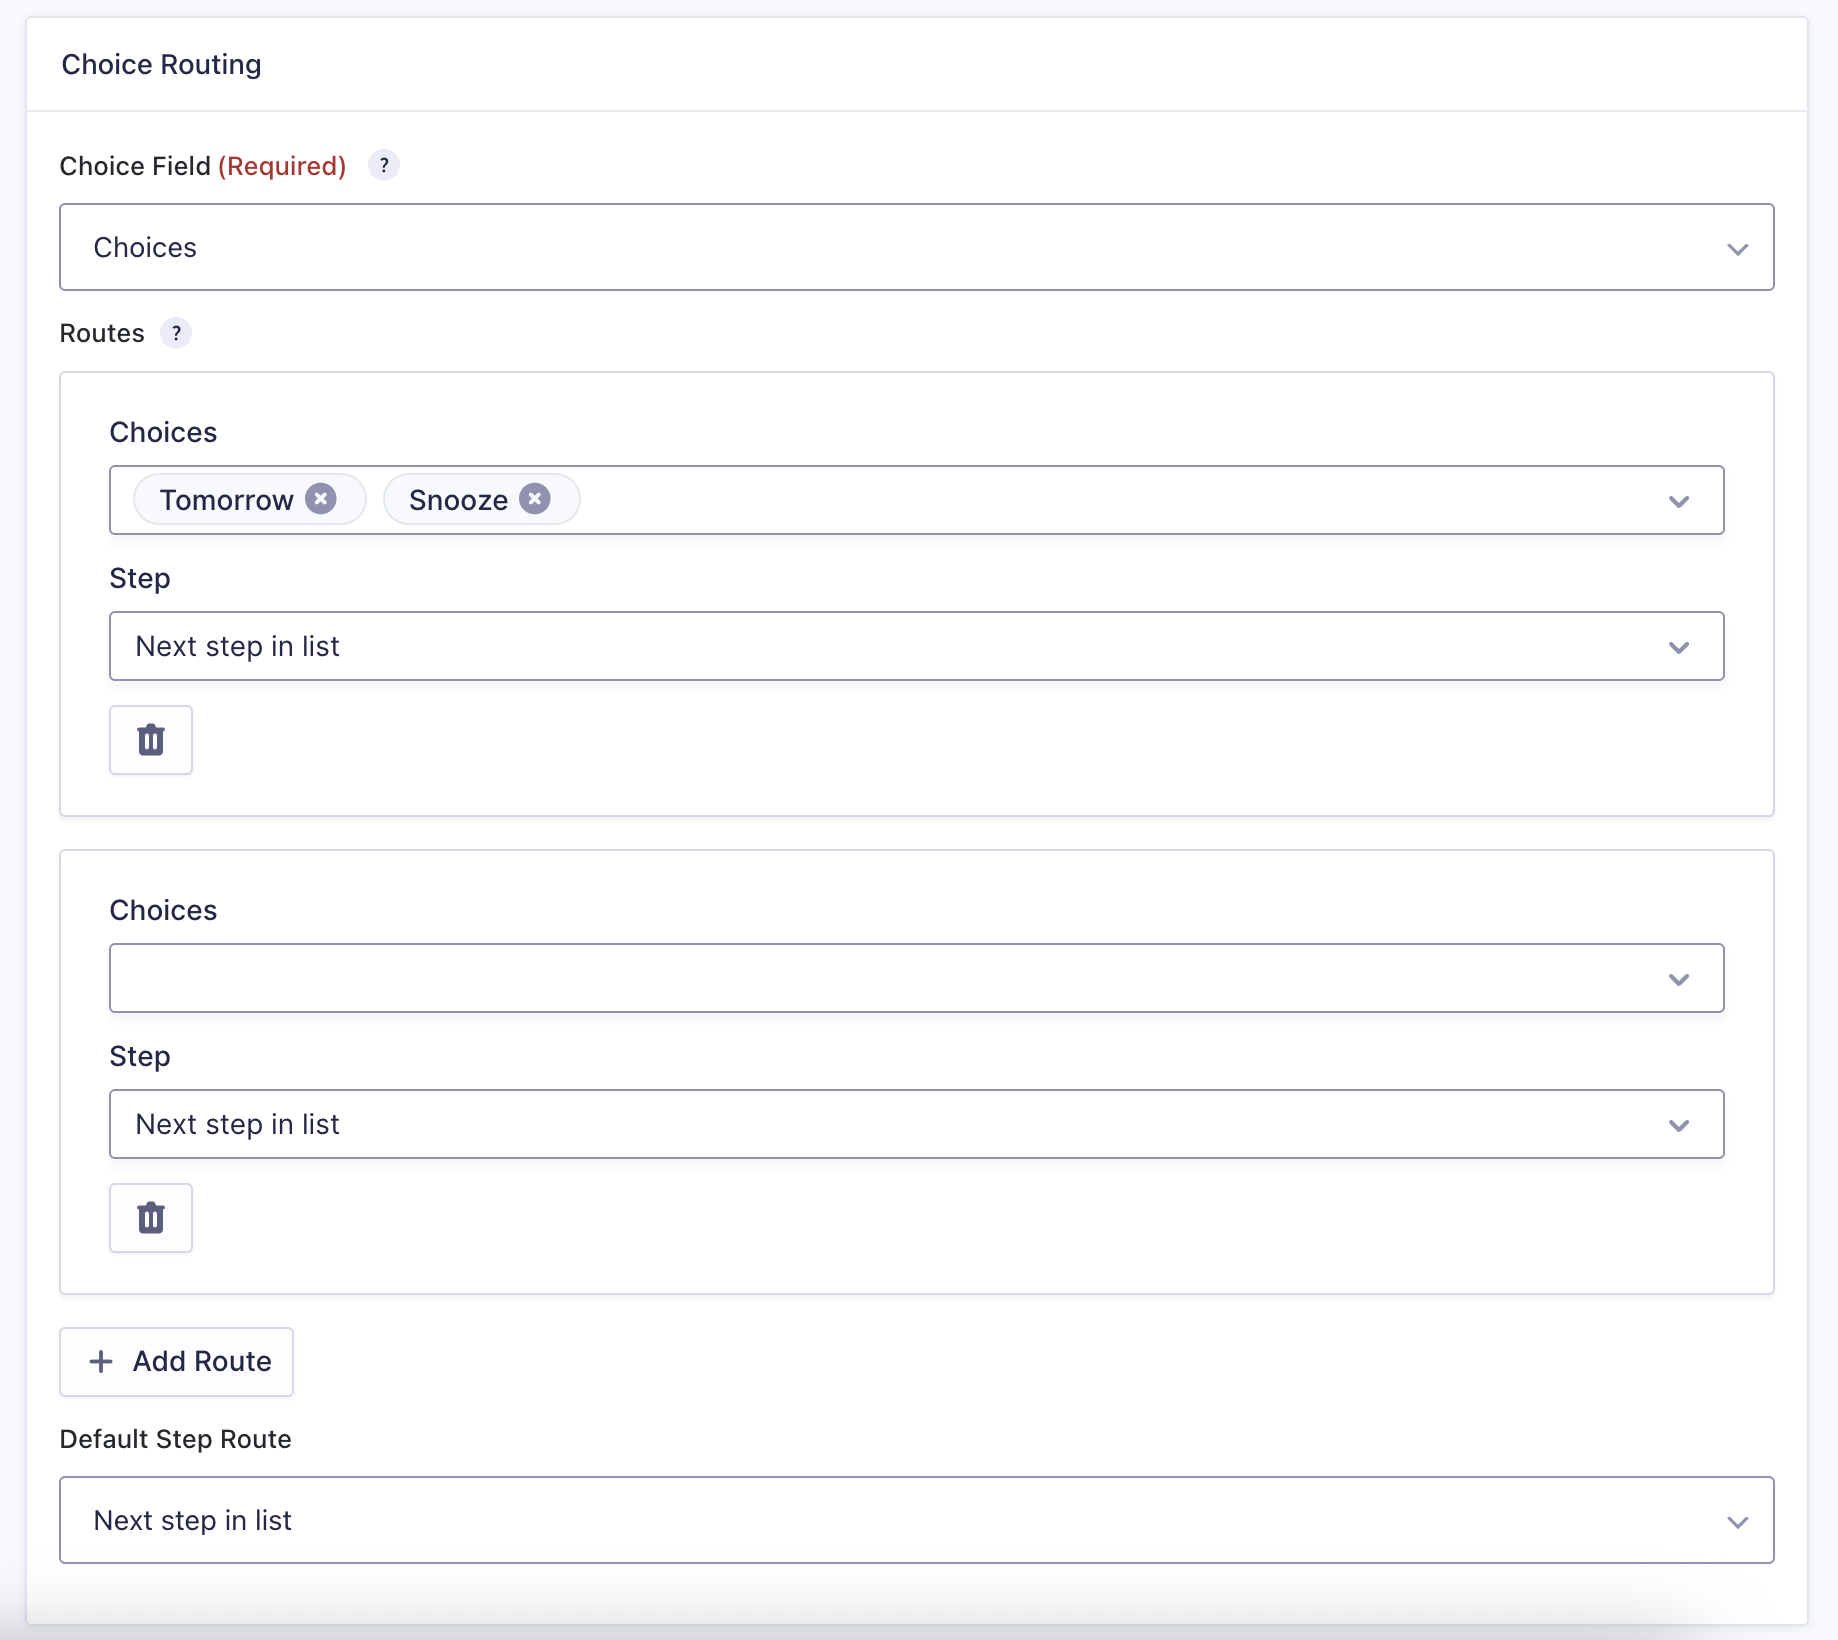
| Setting | Summary |
|---|---|
| Choice Field | Select the radio or dropdown field whose submitted value determines the next step. |
| Routes | Map one or more field choices to a destination step. Each choice may only appear in one row. |
| Default Step Route | The step the entry will be sent to if no routing rule matches the submitted value. Defaults to Next step in list. |
Choice Field
Select the form field whose value will be evaluated when the entry reaches this step.
Note: only radio and dropdown fields are available for this selection. Routes will appear below once a field has been selected.
Routes
Each row in the Routes table maps one or more field choice values to a destination step. Use the Choices dropdown to select which choice should trigger the route, and the Step dropdown to select where the entry should go. Multiple choice values can be mapped to each row, but each choice value can only be mapped to one route. Selected choices will not be selectable in other routes. Available destinations include any other step in the workflow (excluding the current step), Next step in list, and Workflow Complete.
Routes must contain choices to successfully save the step. You can add multiple routes using the “Add Route” button and delete existing routes using the delete icon.
Default Step Route
If an entry reaches this step and its field value does not match any row in the Routes table, it will be sent to the destination configured here. This also serves as a fallback if a previously configured target step has been deleted. Defaults to Next step in list.
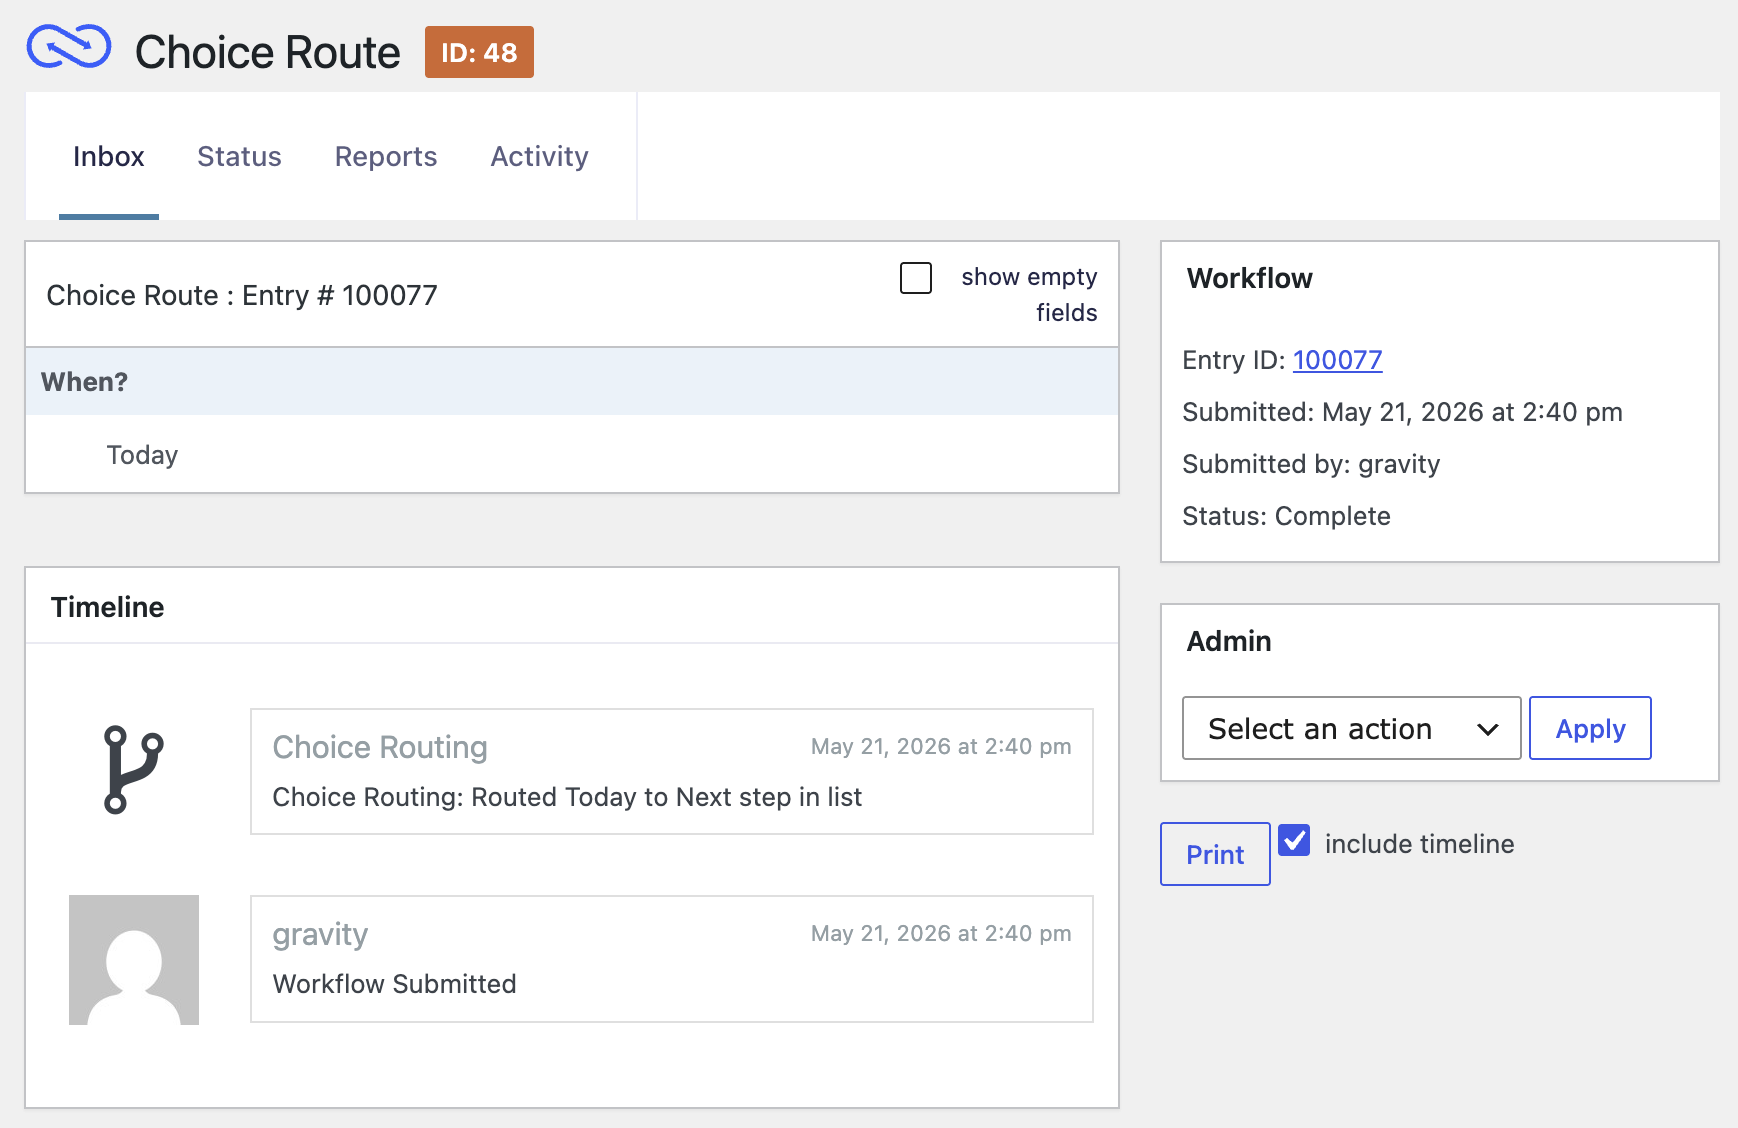
Timeline Notes
When an entry is routed through a Choice Routing step, a timeline note is added to the entry indicating which route was taken and the destination step.
Notes
Circular Routing
When configuring destination steps, take care to avoid creating circular references. If Step A routes to Step B and Step B routes back to Step A, the entry will loop indefinitely and never reach a completed state.
Supported Field Types
Choice Routing supports only radio buttons and dropdown fields.
Example Use Case: Department Request Form
An organization uses a single intake form for requests that need to reach different teams, depending on the type of request. Rather than building separate workflows for each department or relying on complex conditional logic, a single Choice Routing step handles all branching.
- A request is submitted through the intake form.
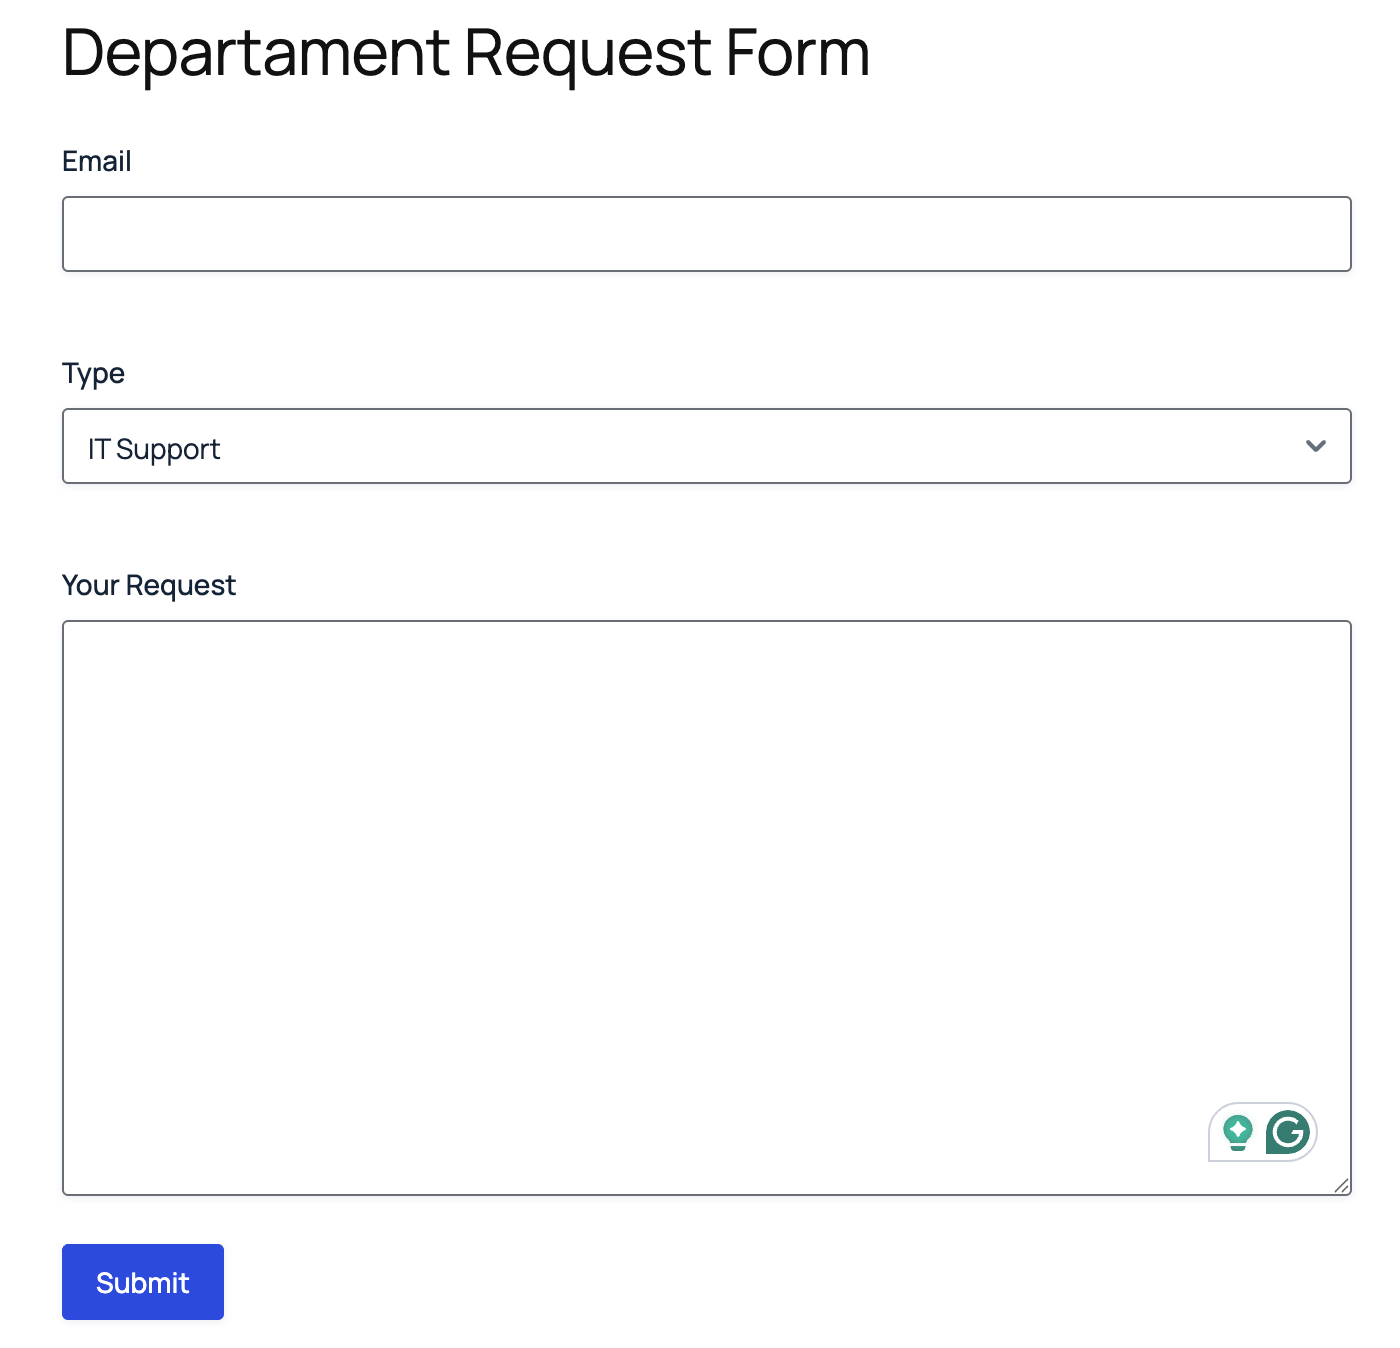
- The Choice Routing step evaluates the request type against the Routes table.

- Based on the match, the workflow routes to the appropriate step:
IT Support and Software Access route to the IT Approval step.
The Budget Request and Expense Reimbursement routes lead to the Finance Approval step.
Hiring Request and Onboarding route to the HR Approval step. - If the request type does not match any configured route, the workflow falls back to the Default Step Route, which is set to a General Review step.

When a new request type is added to the form, only the Routes table needs to be updated, with no new steps or workflow restructuring required.